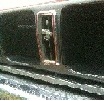
The mag wheel before I started.....

The tools needed for the job

Rub with wet & dry to remove pitting. File off Gutter rash (easier when tyre and wheel weights are not fitted).

After cutting compound and sisal wheel (the small grey wheel and grey polish stick)

After polishing with polishing compund and cloth wheel (large wheel and with polish stick)

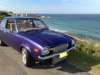
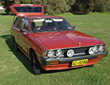
Wheel fitted to my car

Obviously I haven't spent much time on prepping the wheel. The better the wheel the better the result. If more time was spent removing marks and scratches from the wheels then the result would be a lot better. But I did this to prove a point. Wheels/ alloy can be polished in your garage at home. If they are knocked about, that is when you may need a professional or just not bother. These rims, when and if I use them will have the tyres and wheel weights removed. I would then remove all signs of gutter rash, and fully paint the centre, leaving only the polished outer.
To anyone who is going to attempt this, the more prep you put in the better the result.
These rims were in average condition for age, and very little prep put in.
Here's the difference