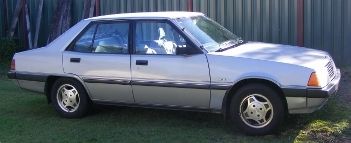
75wagon's GD sedan, now wagon project...

Post your build topics here! This is for restorations only.
User avatar
75wagon
Admin
Posts: 5886
Joined: Sun Apr 12, 2009 5:16 pm
Location: Newcastle/Lake Macquarie

Re: 75wagon's GD sedan, now wagon project...

Post by 75wagon »

Had a play with these seats this morning.
All the electrics are now working :thumpsup:
And all 6 of the lumbar bladders are as well.
Now the hard part, chasing up some new knobs and stuff to complete them, and then I'll have to make a new rear panel for the drivers seat (I'll probably end up making 2 so they both match). I can see the carbon fibre coming out for this job.
If you want any sigma-galant.com stickers, then look here for how to get them sigma-galant.com stickers
User avatar
75wagon
Admin
Posts: 5886
Joined: Sun Apr 12, 2009 5:16 pm
Location: Newcastle/Lake Macquarie

Re: 75wagon's GD sedan, now wagon project...

Post by 75wagon »

Been a while since I posted anything on this, so here's what I got up to this weekend.
The only bit of rust the whole wagon has is in the base of the drivers side guard. The inner and outer are both in need of replacement.
Not so long ago I bought myself a welder, and although I'm still learning to weld body panel thickness steel, I thought I'd have a crack anyway.

I started with separating the rear bracing so I could clean up my repair from the inside as well. Then cut out the affected area, and tried my best to make a patch that fits as neatly as possible.
Image


Image

Welded in. Like I said, still learning to weld thin sheet metal.
Image

Then it was time to take on the rear brace. I made a cardboard template to start.
Image

Shaped it the same as the original part as best I could could manage.
Image

Image

This pic shows how much on the rear brace I removed, what I decided to reuse, and what I made to replace it.
Image

Clamped up and ready to start welding.
Image

Ugly welds, but I have since cleaned it up with a grinder. I've got a little more work to do to it, and will put pics up of the finished product when it's completed.
In the pic also is the 2 rusted sections that were removed.
Image

Dave...
If you want any sigma-galant.com stickers, then look here for how to get them sigma-galant.com stickers
geezer101
Posts: 1869
Joined: Sat Jun 11, 2011 10:49 pm
Location: adelaide (SA)

Re: 75wagon's GD sedan, now wagon project...

Post by geezer101 »

Nice work Dave, welding body panels is not easy. Some grinding and a wipe of filler and it will be presentable. :thumpsup:
C_Fernance
Posts: 728
Joined: Tue Mar 17, 2009 1:19 am
Location: Central Coast

Re: 75wagon's GD sedan, now wagon project...

Post by C_Fernance »

Looks better then my effort.....

Image
User avatar
75wagon
Admin
Posts: 5886
Joined: Sun Apr 12, 2009 5:16 pm
Location: Newcastle/Lake Macquarie

Re: 75wagon's GD sedan, now wagon project...

Post by 75wagon »

This weekend has been productive.
Pulled the brown 2.6 GD out from hibernation, stripped the Rota's off it, and cleaned them up (If anyone's interested in them let me know, the guy who was going to buy them is stuffing me around).
Image

Image

Not sure which way to go, hardtop grille or stock?
Image

So this is what is the end game plan is, everything mechanically from the brown wagon is going into the green one.
Image

Stock as a rock 1.6 auto.
Image

Gordon who I bought the Brown wagon off, has put a lot of time and money into it (he gave me the receipts with it).
I've never seen engine mounts like this before, obviously he had them made for it.
Image

I've got to swap over the boosted brakes from the brown to the green as well, and fit the brackets and bits for the different brake line set up, and clutch cable.
Image

Image

Image

Image

Here's the progress I've actually made rather then just telling everyone what I'm going to do.
Image

Image

Image

As it sits at the time of posting this.
Image


If anyone wants 2 free Borg-warner 35 auto gearboxes with all the extra bits, pick up from Newcastle area let me know.
Otherwise they're going to the scrapyard.
Seems a shame if someone could use them?
Everyone needs spares... if I had an auto, I'd keep them.

Dave...
If you want any sigma-galant.com stickers, then look here for how to get them sigma-galant.com stickers
crystalmeths
Posts: 394
Joined: Wed Mar 18, 2009 7:45 pm
Location: Dapto

Re: 75wagon's GD sedan, now wagon project...

Post by crystalmeths »

nice work Dave , and that welding looks ok mate as I've said before it doesn't matter if it looks shit as long as it has good penetration that's all that counts , looking forward to seeing more of this build , regards Chris :thumpsup:
Superscan811
Posts: 1689
Joined: Sun Mar 22, 2009 4:12 pm
Location: Sydney

Re: 75wagon's GD sedan, now wagon project...

Post by Superscan811 »

Those engine mounts are urethane. Oil and grease don't affect them but the early style did tend to de-laminate after a while.


Cheers.
User avatar
75wagon
Admin
Posts: 5886
Joined: Sun Apr 12, 2009 5:16 pm
Location: Newcastle/Lake Macquarie

Re: 75wagon's GD sedan, now wagon project...

Post by 75wagon »

Glad I had the smarts to cut some bits out the GD sedan (the one that started this topic) before it was scrapped. They'll make life a bit easier, and keep things looking more factory like.

Gearbox tunnel, and clutch cable firewall tube.
The tunnel will get cut up so the factory rubber boot will still line up in the new gearstick position, and I need a clutch cable tube in the firewall, so why not use what the factory has already made?
Image

So I've drilled out the spot welds tonight, just got to drill the hole in the firewall, clean it all up and weld it on.
Image

Dave...
If you want any sigma-galant.com stickers, then look here for how to get them sigma-galant.com stickers
User avatar
75wagon
Admin
Posts: 5886
Joined: Sun Apr 12, 2009 5:16 pm
Location: Newcastle/Lake Macquarie

Re: 75wagon's GD sedan, now wagon project...

Post by 75wagon »

This build has been too long in the collecting stage. I've collected more stuff then I probably need.
Now the hard part is how to best use it all.

NOS and OS parts I've collected.
I like to think of it as wagon porn...
Image

There's more, I'm just working though it all. I'm finding things that I forgot I bought.
The build part itself, is just about to start, I'm still working out things like body colour, rims, and suspension. The motor/drivetrain will be a work in progress. Gordon (the og builder of the brown wagon) got it to the stage where it's ready to pass engineering. Once built, it will be presented like that so it will pass easily, then I'll start playing with it.

This weekend I plan to start striping the brown wagon and preparing the parts for transfer into the green shell.

Dave...
If you want any sigma-galant.com stickers, then look here for how to get them sigma-galant.com stickers
gaPhil
Posts: 347
Joined: Wed Oct 28, 2009 8:16 pm
Location: Newcastle

Re: 75wagon's GD sedan, now wagon project...

Post by gaPhil »

Looking and sounding good Dave!

You might provide some more inspiration for me to kick things back into gear now that I will have a garage in the next couple of weeks.

What's the plan with the brown wagon, scrap?
71 GA Galant - Project
Build thread is here: http://www.sigma-galant.com/viewtopic.php?f=48&t=5600
User avatar
75wagon
Admin
Posts: 5886
Joined: Sun Apr 12, 2009 5:16 pm
Location: Newcastle/Lake Macquarie

Re: 75wagon's GD sedan, now wagon project...

Post by 75wagon »

gaPhil wrote:What's the plan with the brown wagon, scrap?
It will be stripped of everything, the front will most likely be going towards getting Tj's hardtop repaired, and the rest of the shell will most likely end up as scrap.

Dave...
If you want any sigma-galant.com stickers, then look here for how to get them sigma-galant.com stickers
User avatar
75wagon
Admin
Posts: 5886
Joined: Sun Apr 12, 2009 5:16 pm
Location: Newcastle/Lake Macquarie

Re: 75wagon's GD sedan, now wagon project...

Post by 75wagon »

I'm still trying to work out what rims I'll running on the completed build, but just though I'd take one last opportunity to see what the 13x6 Hustlers look like on this shell before I strip it, which is what I've started doing this weekend.
Image

I learnt some things this weekend, I'd been told before of how tight the fitment of a wideblock 5 speed is in a manual Galant shell. And I found that the only way to pull the motor and box out together as one unit (which is my preferred method of doing it) is to drop the idler arm.
Here's the clearance I was dealing with, motor and box were supported by block and tackle at this stage, and it's pretty much as far as I could get it out.
Bell housing to steering arms.
Image

Bellhousing to firewall/tunnel. In the tunnel the box is hard up to the top.
Image

With the idler arm dropped, it came straight out easy as.
Image

Image

Inside the car I found this.
Probably the ugliest floor treatment for a gearbox conversion I've seen in a while.
Image

I wont be running this gearbox in my build because of how far back the shifter sits in a Galant shell (135mm back from stock location).
If anyone is interested in buying this wideblock borg warner 5 speed box (suits Sigma GJ onwards sedans) then let me know. I have receipts for the gearbox rebuild (they came with the car), it was done back in 2006, and sat idle ever since (car never got finished), it wouldn't have even travelled 5kms in total since the rebuild (couple of laps around the block and that's it).
There's a modded tailshaft there as well to suit install into a Galant, so if someone wants to use it in a Galant again everything is there.

Open to offers.
Image

Dave...
If you want any sigma-galant.com stickers, then look here for how to get them sigma-galant.com stickers
User avatar
75wagon
Admin
Posts: 5886
Joined: Sun Apr 12, 2009 5:16 pm
Location: Newcastle/Lake Macquarie

Re: 75wagon's GD sedan, now wagon project...

Post by 75wagon »

Time to start the brake conversion.
Going to have to convert this,
Image

To this.
Image

I've got 2 options, hole cut the green shell as it is, or drill out the spot welds, and swap the strengthener over and re-weld in place. The firewall from what I have discovered has the larger hole for the boosted set up, I now just have to decide which way I'm going to do it.

To go from non boosted to boosted brakes.
Image

I've also got to cut off this bracket that supports this valve/switch, and weld it into the green shell as well.
Image

I'll have to change over the wiring harness and instrument panel (the boosted models have a brake light indicator instead of a door light). Changing the harness aids me in 2 ways, I get the already modded for 2.6 loom, and suits the brake set up as well.

I've starting stripping both shells back so I can work on them. All front panels off, and removed the wiring harness and brake lines from the green shell.
While I was doing it I found these in the loom.
The green wire which is already in the loom to hook up the factory tacho (just hook it up to the negative on the coil)
Image

and these 2 wires here that interestingly on an auto are for reverse lights and hook up to the reverse light switch on the gearbox. Got plugs on them and everything ready to go.
Image

harness all but removed, but took the time to label it for future reference
Image

And just a little something I do with cars as I build them, cleaning up the threads with a tap just to make sure things go back together smoothly.
Image

Dave...
If you want any sigma-galant.com stickers, then look here for how to get them sigma-galant.com stickers
User avatar
75wagon
Admin
Posts: 5886
Joined: Sun Apr 12, 2009 5:16 pm
Location: Newcastle/Lake Macquarie

Re: 75wagon's GD sedan, now wagon project...

Post by 75wagon »

Still moving forward with this, and trying to help others complete theres.
Image

Image

Image

Front apron soon to find it's way onto Tj's hardtop after it met an unfortunate incident.
Image

Gordon (who I bought the brown wagon off) didn't want me to strip it, but I hope I will honor the legacy of his wagon to live on as a parts donor. The heart will live on in Prosser's old green wagon, with a few of the panels as well.

Dave...
If you want any sigma-galant.com stickers, then look here for how to get them sigma-galant.com stickers
User avatar
VGJONO
Posts: 1245
Joined: Wed Mar 07, 2012 12:21 pm

Re: 75wagon's GD sedan, now wagon project...

Post by VGJONO »

This is looking good Dave, you certainly have got a lot done in the space of a few days. If you lived closer you would probably have me sitting out the front frothing at the mouth for parts off of that brown wagon :lol:

With the reverse light switch wires, i come across that in my GD sedan when i converted it, also found out that the gearbox cross-member position to fit the Jap 5 speed is the same as the bw35 auto. ofcourse i only found this out after i had already converted to a 4 speed that failed and ended up getting a 5 speed anyways :P (this is using a KM119 Jap 5 speed anyways, i cant say if a KM132 is the same)

Cheers
VGJONO :thumpsup:
Sparkington
Sigma-Galant Police (Global Mod)
Posts: 209
Joined: Fri Feb 18, 2011 2:40 pm
Location: QLD-Brisbane

Re: 75wagon's GD sedan, now wagon project...

Post by Sparkington »

epic build mate, lease the brown wagon helping other galants live on :D
Image
User avatar
75wagon
Admin
Posts: 5886
Joined: Sun Apr 12, 2009 5:16 pm
Location: Newcastle/Lake Macquarie

Re: 75wagon's GD sedan, now wagon project...

Post by 75wagon »

Thanks very much for the kind words of encouragement lads, it's what keeps me going.
I really appreciate any feedback I can get, even if it's not positive, I can take something from anything and hopefully improve the final product.

I've just had a small break away and now I'm back from some much needed time off, I'm straight back into it.

Boosted brake conversion underway.
I decided to re-drill the auto non-boosted brake body as closer inspection showed it was not as I first thought.
Image

The template needed a little bit of adjustment to make sure it was accurate enough to use.
Image

2 holes line up, that makes life a little bit easier to get things more accurate.
Image

Boosted manual versus non-boosted auto pedal set.
Interesting how different they are.
Image

Clutch cable conversion marked out on the firewall while I'm at it as well.
Image

Clutch cable hole completed
Image

How I held it in place for welding doing it all on my own.
Image

Clutch cable tube welded in place (yes I know I'm not a welder) and lexan jig made up for locating the main hole for the booster.
If anyone is doing the same thing, shoot me a pm, I could lend it to you to make life a lot faster.
Image

How I held the lexan jig in place whilst drilling the 60mm bore hole needed.
Image

Completed and bolted up all in place.
I'm pretty happy with how it turned out, it fit up first go without any need for adjustments or elongating holes.
Image

Image

3 pedals always look better then 2 IMO.
Image

The lexan jig, if anyone needs it?
Image

The piece left after drilling out the main hole to 60mm
Image

Dave...
If you want any sigma-galant.com stickers, then look here for how to get them sigma-galant.com stickers
User avatar
bruggz351
Posts: 1486
Joined: Tue Apr 26, 2011 5:14 pm
Location: Northern Rivers NSW

Re: 75wagon's GD sedan, now wagon project...

Post by bruggz351 »

:thumpsup:

Nice work man...

cheers
'82 GJ GSR Silver (family heirloom):)
Image
crystalmeths
Posts: 394
Joined: Wed Mar 18, 2009 7:45 pm
Location: Dapto

Re: 75wagon's GD sedan, now wagon project...

Post by crystalmeths »

Nice neat work Dave well done mate :thumpsup:
geezer101
Posts: 1869
Joined: Sat Jun 11, 2011 10:49 pm
Location: adelaide (SA)

Re: 75wagon's GD sedan, now wagon project...

Post by geezer101 »

Nice work Dave. :thumpsup: You thought about getting rid of the floor pivot accelerator pedal and using a suspended pedal assembly?
User avatar
75wagon
Admin
Posts: 5886
Joined: Sun Apr 12, 2009 5:16 pm
Location: Newcastle/Lake Macquarie

Re: 75wagon's GD sedan, now wagon project...

Post by 75wagon »

Thanks for the words of encouragement :thumpsup:
geezer101 wrote:You thought about getting rid of the floor pivot accelerator pedal and using a suspended pedal assembly?
Yeah I had though of it, a while back, but decided there are some things about the character of an old car that are just worth keeping.

Got a bit more done today towards the brake conversion. I trial fitted it all up in the green shell, I knew I had 1 more bracket I had to add, and then realised I had to transfer more over then I thought.
Image

I love how easy Mitsubishi makes all of this for us. Registration marks for where things need to be fitted even though it was never getting them.
Image

Image

Bracket welded in place (again ugly welds, but grinders can fix a multitude of sins), brake lines all fitted in, and this is where I realised I needed more from the other shell. The tabs that locate the brake lines in place also have to come across, and there are ones not being used with the new brake set up, so I'm going to remove them.
Image

To fit the overflow bottle I decided I wanted to do it differently to how Gordon did it in the brown shell.
I took the washer bottle mount out of the brown shell, modified it to suit and used it instead. I also needed to relieve a small section to the inner guard so it would sit low enough. That's some of the ugliest welding I think I've ever done... lol
Image

All so the 2 bottles can sit like this.
Image

Instead of like this.
Image

More coming tomorrow.

Dave...
If you want any sigma-galant.com stickers, then look here for how to get them sigma-galant.com stickers
geezer101
Posts: 1869
Joined: Sat Jun 11, 2011 10:49 pm
Location: adelaide (SA)

Re: 75wagon's GD sedan, now wagon project...

Post by geezer101 »

The washer and overflow bottle location looks sooo much more orderly now Dave - good call :thumpsup:
Superscan811
Posts: 1689
Joined: Sun Mar 22, 2009 4:12 pm
Location: Sydney

Re: 75wagon's GD sedan, now wagon project...

Post by Superscan811 »

Image
Massaged or cut and welded?


Cheers.
User avatar
75wagon
Admin
Posts: 5886
Joined: Sun Apr 12, 2009 5:16 pm
Location: Newcastle/Lake Macquarie

Re: 75wagon's GD sedan, now wagon project...

Post by 75wagon »

Yeah sorry, I didn't make that clear.
The recess was panel beaten, not cut and welded.

Dave...
If you want any sigma-galant.com stickers, then look here for how to get them sigma-galant.com stickers
User avatar
75wagon
Admin
Posts: 5886
Joined: Sun Apr 12, 2009 5:16 pm
Location: Newcastle/Lake Macquarie

Re: 75wagon's GD sedan, now wagon project...

Post by 75wagon »

Here's the next hurdle.
To cut and weld, or just resort to a big hammer?

Manual tunnel to clutch pedal.
Image

Auto tunnel to clutch pedal.
Image

The measurements are not accurate, but it works out that its about 60 to 70mm too small for my foot to fit.

Dave...
If you want any sigma-galant.com stickers, then look here for how to get them sigma-galant.com stickers
User avatar
75wagon
Admin
Posts: 5886
Joined: Sun Apr 12, 2009 5:16 pm
Location: Newcastle/Lake Macquarie

Re: 75wagon's GD sedan, now wagon project...

Post by 75wagon »

Does anyone have any idea how much of a problem I would have getting through engineering in NSW if I made a removable bolt in/out panel?
That way I could give my foot room whilst driving, and still have the advantage of plenty of room to work on it when I need to?

Dave...
If you want any sigma-galant.com stickers, then look here for how to get them sigma-galant.com stickers
geezer101
Posts: 1869
Joined: Sat Jun 11, 2011 10:49 pm
Location: adelaide (SA)

Re: 75wagon's GD sedan, now wagon project...

Post by geezer101 »

In your comparative pics between the auto to manual clutch pedal clearance, it looks to me the factory manual pedal is bent more towards the steering column shaft. A bit of manipulation will give you an extra 20-25mm clearance without resorting to beating the crap out of it with big hammer.
User avatar
75wagon
Admin
Posts: 5886
Joined: Sun Apr 12, 2009 5:16 pm
Location: Newcastle/Lake Macquarie

Re: 75wagon's GD sedan, now wagon project...

Post by 75wagon »

geezer101 wrote:In your comparative pics between the auto to manual clutch pedal clearance, it looks to me the factory manual pedal is bent more towards the steering column shaft. A bit of manipulation will give you an extra 20-25mm clearance without resorting to beating the crap out of it with big hammer.
I'm pretty confident it's just the weird angle of the pic (it was pretty difficult holding all that stuff there on my own, not enough hands).
I'll measure the spacing of the 2 pedal sets to be sure.

The pedal spacing in one of these is pretty tight, and works really well for me. I'd rather bend the shell then the pedal set.

Dave...
If you want any sigma-galant.com stickers, then look here for how to get them sigma-galant.com stickers
Superscan811
Posts: 1689
Joined: Sun Mar 22, 2009 4:12 pm
Location: Sydney

Re: 75wagon's GD sedan, now wagon project...

Post by Superscan811 »

How much wider is the auto trans tunnel compared to the manual?


Cheers
User avatar
75wagon
Admin
Posts: 5886
Joined: Sun Apr 12, 2009 5:16 pm
Location: Newcastle/Lake Macquarie

Re: 75wagon's GD sedan, now wagon project...

Post by 75wagon »

Superscan811 wrote:How much wider is the auto trans tunnel compared to the manual?
Trying to give a measurement on something that's not square is not fun.

Measurements taken a firewall:
- auto tunnel at widest point 360mm
- manual tunnel at widest point 340mm and 240mm at widest part of the start of the smaller section.

Measurements taken from kick panel at base of brake pedal height:
- tunnel side of clutch pedal 370mm
- pedal side of auto tunnel 440mm
- pedal side of manual tunnel 520mm

Auto tunnel:
Image

Manual tunnel:
Image

I've contacted the engineer I'm using:
Me: My problem is: The Galant wagon shell is an auto shell, and with a manual pedal set there is not enough room for my left foot to go beside the pedal.
My Question is: Is it legal to cut the floor and make a bolt in/out panel (reinforcing around the area where the panel is of course), or is it an absolute no no, to cut the floor?
Is my only option to massage the area using panel beating to solve the problem?
Answer: It is fine to modify the floor providing that, where necessary, any structural elements such as box sections are reinforced to compensate.
Me: Excuse my inexperience here, but if I cut and weld the floor, I would require a certificate yes?
How difficult would it be for me to obtain one, if the modification is done by myself (non ticketed welder) in my garage?
Would the other option of massaging (panel beating) the floor require a certification ticket? Or cause me any hassles towards registration?
Answer: Panel beating a single layer panel would not require certification. It's a somewhat grey area, but cutting and welding probably would.. If the vehicle requires certification for the engine conversion, this modification would normally be listed on the certificate and hence covered.
Even if the vehicle didn't require certification, I wouldn't expect panel beating of a single layer panel in this area to cause any problems for the blue slip.

So from this I am leaning towards cutting out a section, and making a bolt in bolt out panel, that is reinforced around the hole. I picture a small 90 degree return around the edge of the hole for a bit more strength, a 10 to 20mm strip of metal doubling up around the hole (body steel thickness or thicker) with captured nuts, and similar for the removable panel, but obviously with holes for bolts, not captured nuts.

Does this sound feasible?

Dave...
If you want any sigma-galant.com stickers, then look here for how to get them sigma-galant.com stickers
Post Reply