I've never had to deal with getting anything chromed/re-chromed but it'll need to go through an electroplater's to be restored. It'll need the old chrome removed before replating it. If you go through with it, ask them to re-chrome it slowly - this will ensure it won't peel off again for a long time (apparently it is tricky getting chrome to take to die cast metal)partyboyjay wrote:How, who, where would I get something like that done?
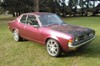
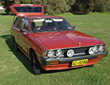
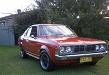
76 Colt Galant GTO GSR 2000
Re: 76 Colt Galant GTO GSR 2000
Re: 76 Colt Galant GTO GSR 2000
Here is the factory battery tray/ heat shield.

The radio face is plastic under the chrome and it's quite a specialised job to re-chrome. It can be very difficult to strip the old chrome off without damaging the plastic.
The radio face is plastic under the chrome and it's quite a specialised job to re-chrome. It can be very difficult to strip the old chrome off without damaging the plastic.
Re: 76 Colt Galant GTO GSR 2000
Uh oh. Unusual that they chose plastic over die cast metal. Still, it can be done but not so sure about removing the lifted chrome off (they may be able to use electrolysis but if I remember, there are some evil susbstances given off from using that technique on chrome). Looks like the only other viable option is to hunt down a good second hand one.dwlee wrote: The radio face is plastic under the chrome and it's quite a specialised job to re-chrome. It can be very difficult to strip the old chrome off without damaging the plastic.
-
mrelshauno
- Posts: 156
- Joined: Tue Sep 04, 2012 6:00 am
Re: 76 Colt Galant GTO GSR 2000
I'm sure I have seen on www.oldschool.co.nz a thread about successful rechroming of plastic.
Re: 76 Colt Galant GTO GSR 2000
It's difficult to tell how bad the bubbling is, but the finish doesn't look torn so you could try get getting a fine syringe and squeezing a tiny amount of low viscosity glue under there. Then rub it through under all the bubbly bits, squeeze excess carefully out through hole.partyboyjay wrote: heres the radio, please take note of the bubbling around the tuner dials this is what I want to fix
input and feedback welcome and wanted please
Just an idea.

-
partyboyjay
- Posts: 102
- Joined: Fri Nov 09, 2012 12:16 am
- Location: Yorkshire
Re: 76 Colt Galant GTO GSR 2000
Yeah I dont have one of those, but may be able to get one, didn't know if what I had was stock, I just have a simple rectangular top clamp to hold battery in place! No shield for it!Here is the factory battery tray/ heat shield.
Lol that isn't a viable option considering how hard it was to find the radio to begin with lol! Will certainly keep an eye out though!Looks like the only other viable option is to hunt down a good second hand one.
It isn't torn at all, but getting close, I don't think it'll take much! Syringe maybe a good idea, will see if I can go down professional work first!the finish doesn't look torn
Re: 76 Colt Galant GTO GSR 2000
Once you've got some bracing tacked in and she's been shot blasted I'm sure it won't seem half as daunting. Keep it up dude 
-
partyboyjay
- Posts: 102
- Joined: Fri Nov 09, 2012 12:16 am
- Location: Yorkshire
Re: 76 Colt Galant GTO GSR 2000
right guys it's been a while since i've had any time for the car as my new job kind of took priority (especially with the new shift pattern!) anyway i'm on my last day today with my 10 day shift break so heres a little update on the plan for easter work:
Picking up an engine hoist tomorrow so hopefully saturday/sunday will be removing the engine, also earmarked for removal is the fuel tank, drive shaft, and most likely transmission!
then begins the decision of what to start shotblasting first as funds are limited with house saving going on so advice welcome, should i do the parts ive removed? or the shell?
i planned on keeping the engine as a seperate project (doesnt need recon as that has been done already) just needs a deep clean and bringing everything up shiney so plan on handing that off to someone else which gives me time to focus on the car! (driveby any recommendations???) i have found a company in manchester that has some nice pictures of end results but after speaking to him he mainly does motorbike engines and stressed he'd take it on but couldnt make any promises on the finish.
how is shotblasting at getting off underseal? would it be advisable to try and wirebrush the underside of the car beforehand? as i wanted to get everything as clean as possible for a fresh start? the floor is solid and does have a coat on there would it matter if i left it on and just gave a new layer to it or is my clean and fresh approach better? advice please
should be opening a big parcel from new zealand when i get home full of chrome window trim and badges and an uncut centre console and loads of other trinkets cant wait!!!
Talk to me guys!
Picking up an engine hoist tomorrow so hopefully saturday/sunday will be removing the engine, also earmarked for removal is the fuel tank, drive shaft, and most likely transmission!
then begins the decision of what to start shotblasting first as funds are limited with house saving going on so advice welcome, should i do the parts ive removed? or the shell?
i planned on keeping the engine as a seperate project (doesnt need recon as that has been done already) just needs a deep clean and bringing everything up shiney so plan on handing that off to someone else which gives me time to focus on the car! (driveby any recommendations???) i have found a company in manchester that has some nice pictures of end results but after speaking to him he mainly does motorbike engines and stressed he'd take it on but couldnt make any promises on the finish.
how is shotblasting at getting off underseal? would it be advisable to try and wirebrush the underside of the car beforehand? as i wanted to get everything as clean as possible for a fresh start? the floor is solid and does have a coat on there would it matter if i left it on and just gave a new layer to it or is my clean and fresh approach better? advice please
should be opening a big parcel from new zealand when i get home full of chrome window trim and badges and an uncut centre console and loads of other trinkets
Talk to me guys!
Re: 76 Colt Galant GTO GSR 2000
These guys ( http://www.facebook.com/#!/SurfaceProcessing?fref=ts )seem busy at the moment. I'd say strip the shell completely, brace it and have it dipped or blasted. The concetrate on getting the shell perfect. After that the rest is all much easier and less expensive work where you can get little bits done and slowlt reassemble as you are going along.
What exactly do you want from the engine work? just sprucing up or full on every part stripped and repainted?
What exactly do you want from the engine work? just sprucing up or full on every part stripped and repainted?
Re: 76 Colt Galant GTO GSR 2000
+1 for starting with the shell. That is the big job and will take the longest, the bolt on parts are for beautification and can be done rather quickly.
-
partyboyjay
- Posts: 102
- Joined: Fri Nov 09, 2012 12:16 am
- Location: Yorkshire
Re: 76 Colt Galant GTO GSR 2000
I'd like it as clean as possible, stripped and re painted sounds like a lot of work and money! Pros and cons for this vs sprucing up???What exactly do you want from the engine work? just sprucing up or full on every part stripped and repainted?
I've been looking at this site http://www.aloh.co.uk/samples/ what's the opinion???
Also do you know of a place which could refurbish my seat mechanisms? Not the upholstery but the framework and sliders etc
-
partyboyjay
- Posts: 102
- Joined: Fri Nov 09, 2012 12:16 am
- Location: Yorkshire
Re: 76 Colt Galant GTO GSR 2000
Ok guys first day back at it, went down and had 4 hours today, soon passes when your having fun lol!
So with a little help I managed to get the windscreen out, drive shaft off, and the engine and gearbox have been removed!!! YAY!!!
Here's some pics:


The ever expanding parts pile!!!

And the bits that turned up in the post the other day

This brings my consoles to a total of 3! But this last one is the most important as the bracket only has minor cuts, but the plastic console is uncut!!! Making my stock radio a perfect fit
Also got the pics from affa on my rear lights he's restoring for me:


After todays work, and pending on the reply I get from the email I sent last night it has been decided that the best route to take with the old girl is to get her dipped! (opinions people???) I just think that with the amount of rust I'm seeing it may be the best option over shotblasting. So I will be stripping her naked! More work (a lot more!) but I think it should pay dividends in the long run? Got the rest of the week off so think ill get the doors and boot lid off tomorrow, or clear out the engine bay a little more
So with a little help I managed to get the windscreen out, drive shaft off, and the engine and gearbox have been removed!!! YAY!!!
Here's some pics:
The ever expanding parts pile!!!
And the bits that turned up in the post the other day
This brings my consoles to a total of 3! But this last one is the most important as the bracket only has minor cuts, but the plastic console is uncut!!! Making my stock radio a perfect fit
Also got the pics from affa on my rear lights he's restoring for me:
After todays work, and pending on the reply I get from the email I sent last night it has been decided that the best route to take with the old girl is to get her dipped! (opinions people???) I just think that with the amount of rust I'm seeing it may be the best option over shotblasting. So I will be stripping her naked! More work (a lot more!) but I think it should pay dividends in the long run? Got the rest of the week off so think ill get the doors and boot lid off tomorrow, or clear out the engine bay a little more

Re: 76 Colt Galant GTO GSR 2000
I looked at the link DriveBy providedpartyboyjay wrote:it has been decided that the best route to take with the old girl is to get her dipped! (opinions people???)
This does look expensive. But it also looks like the best way to preserve what you have. You are talking about going for the primer coating at the end as well aren't you?DriveBy wrote:These guys ( http://www.facebook.com/#!/SurfaceProcessing?fref=ts )seem busy at the moment. I'd say strip the shell completely, brace it and have it dipped or blasted. The concetrate on getting the shell perfect. After that the rest is all much easier and less expensive work where you can get little bits done and slowlt reassemble as you are going along.
What exactly do you want from the engine work? just sprucing up or full on every part stripped and repainted?
Dipping a car removes everything (and I mean everything). So that makes the inner sides will be completely bare as well (all the bits you can't get paint to), that will create places to rust if they aren't coated with something.
Blasting on the other hand creates another problem of the blasting beads getting into places it shouldn't be. I bought a Lancer Hatch years ago that had the engine bay blasted. The chassis rails were full of beads, and so was everywhere else that could fill up with them. It took me ages to get compressed air into everywhere to blow them out again (I still don't know if I got them all out). I would imagine chassis rails full of beads would promote rust also?
Depending on what your idea of sprucing up means?partyboyjay wrote:Pros and cons for this vs sprucing up???
I've always been a bit tight for funds, so I've always run with the theory "Time I have money I don't". I remove all paint off the outside of the shell (by either chemical stripper or mechanical sanding methods). It's a slow, but fits my budget, and also allows me to control exactly what is stripped, and what isn't. When I complete all of my paint work, I then use odourless fish oil and spray it in everywhere I know that paint can't get to. There's nothing worse then spending countless hours doing paint and panel work to then 2 years later seeing rust bubbling out of it again.
Dave...
If you want any sigma-galant.com stickers, then look here for how to get them sigma-galant.com stickers
-
partyboyjay
- Posts: 102
- Joined: Fri Nov 09, 2012 12:16 am
- Location: Yorkshire
Re: 76 Colt Galant GTO GSR 2000
Yeah I'd be doing the dip, then the e-coat seal, then the primer, think they call it a 4 stage process, the dip, clean, electro magnetic seal, then finally the primer, so the interior should be sealed after the e-coat and primer dip.You are talking about going for the primer coating at the end as well aren't you?
Appreciate the input Dave, new knowledge gained on the shotblasting side!
Emailed them today so just gonna wait for a reply with some info a possibly a quoteThis does look expensive
-
partyboyjay
- Posts: 102
- Joined: Fri Nov 09, 2012 12:16 am
- Location: Yorkshire
Re: 76 Colt Galant GTO GSR 2000
Need a bit of help please guys, I can't figure out how to remove my steering wheel or my dash???? 
Feel like such a retard!
Feel like such a retard!
Re: 76 Colt Galant GTO GSR 2000
Is the problem with the steering wheel that after removing the retaining nut it wont come off, or is it that you don't know how to remove the centre of the steering wheel to expose it?partyboyjay wrote:I can't figure out how to remove my steering wheel or my dash????
I'm unfamiliar with that exact steering wheel centre, but the Lancer hatch ones that are similar the rubber centre is lipped over a metal base plate, you just carefully peel the rubber off the base plate.
If it's the wheel wont come off the steering column shaft go and get yourself a steering wheel puller from a parts shop. I bought one years back, an it only cost me $10 or so.
As for the dash, there are screws that should be visible. The instrument panel should come out first, and the glovebox as well. Again I haven't worked on a GTO before, but my advice is slowly and carefully, you don't want to break anything.
Once all of the front of the dash is removed, the dash pad will be held in by approx 8 screws from underneath the top of the dash panel.
Dave...
If you want any sigma-galant.com stickers, then look here for how to get them sigma-galant.com stickers
-
partyboyjay
- Posts: 102
- Joined: Fri Nov 09, 2012 12:16 am
- Location: Yorkshire
Re: 76 Colt Galant GTO GSR 2000
This is my issue, the cap spins but doesn't twist off, ill look and see about edging it off next time cheers Dave,you don't know how to remove the centre of the steering wheel to expose it?
Is that just held in by the 4 screws in the top of the panel? As I've removed these and it doesn't want to budge, I can't seem to locate any visible screws underneath? I should've taken some pics thinking back now but I was getting frustrated so left it before I broke something!The instrument panel should come out first
Re: 76 Colt Galant GTO GSR 2000
There will also be 3 or 4 screws holding it from underneath too I think mate, there are on the GC and GA/B's
The rubber centre cover should just "peel" off but be gentle, they are hard to replace ;)
Hot tip for the steering wheel; leave the nut on a turn or two before pulling on the wheel, it will stop it from hitting you in the face as the really pop when they let go.
The rubber centre cover should just "peel" off but be gentle, they are hard to replace ;)
Hot tip for the steering wheel; leave the nut on a turn or two before pulling on the wheel, it will stop it from hitting you in the face as the really pop when they let go.
-
partyboyjay
- Posts: 102
- Joined: Fri Nov 09, 2012 12:16 am
- Location: Yorkshire
Re: 76 Colt Galant GTO GSR 2000
Ok guys so another half days work on it, I'm now in no rush as I've decided to dip the shell and the whole process from dip to e-coat is around £3000, so saving time!
TA-DA!!!!

Managed to get pretty much everything out of the front end today! Retarded as I am I forgot to take the retaining screws on the lights and accompanying switches which were holding the dash in! After that was removed everything came apart really easily!
After the dash had been removed and the blower unit had been taken off I got to work cable tying and labelling the wires as they came out, then managed to get the wiring loom out!

Get shivers every time I look at that thing! Don't want to do it but it has to be done! So I plan on removing all the old tape and applying some new im hoping this will make it more flexible when putting it back! Also thanks to the "great" red spray job done on it, half the wiring is covered in red paint! So some new tape will hopefully restore its former glory!
Not a lot left on the car now so I should start seeing some actual restoration progress, as whilst im saving for the big dipping spend I can get pieces shot blasted and powdercoated to go straight back on when I get the shell finished
TA-DA!!!!
Managed to get pretty much everything out of the front end today! Retarded as I am I forgot to take the retaining screws on the lights and accompanying switches which were holding the dash in! After that was removed everything came apart really easily!
After the dash had been removed and the blower unit had been taken off I got to work cable tying and labelling the wires as they came out, then managed to get the wiring loom out!
Get shivers every time I look at that thing! Don't want to do it but it has to be done! So I plan on removing all the old tape and applying some new
Not a lot left on the car now so I should start seeing some actual restoration progress, as whilst im saving for the big dipping spend I can get pieces shot blasted and powdercoated to go straight back on when I get the shell finished
Re: 76 Colt Galant GTO GSR 2000
Tell me that you have labelled where everything goes on that harness?
You might remember where things go now, but wait until you need to put it back together... it'll be quite a bit of time away I'd say at a guess? You might not remember quite so well
So how does it work? Do you get it dipped, repair any rusty sections then finish the dipping and e-coat process, or do they completely finish the process and then you start repairs?
You might remember where things go now, but wait until you need to put it back together... it'll be quite a bit of time away I'd say at a guess? You might not remember quite so well
I figured it wouldn't be cheap, but obviously the best way to preserve the shell.partyboyjay wrote:I'm now in no rush as I've decided to dip the shell and the whole process from dip to e-coat is around £3000, so saving time!
So how does it work? Do you get it dipped, repair any rusty sections then finish the dipping and e-coat process, or do they completely finish the process and then you start repairs?
If you want any sigma-galant.com stickers, then look here for how to get them sigma-galant.com stickers
-
partyboyjay
- Posts: 102
- Joined: Fri Nov 09, 2012 12:16 am
- Location: Yorkshire
Re: 76 Colt Galant GTO GSR 2000
That is where I actually did something right for a changeTell me that you have labelled where everything goes on that harness?
Every time I came to disconnecting a wire I took a photo of where it was, then I've bought these cable ties with flat label areas where I can write on, I labelled up 2 cable ties, attached one on each end of the connection, then after my bases were covered I disconnected the plugs
Hope I'm making everyone proud!
probably not taking as many photos as I could, (missing things like where the handbrake goes), but all screws, nuts and bolts are getting bagged up in separate bags, with labels inside saying where they came from, what they're attached to, if theres any missing!
This is done regardless of placing, for instance, when I come to put the handbrake back on I know how many screws go in, I know what length they are supposed to be etc.
The length and size of the bolts etc is mainly for me as I plan on replacing all the nuts, bolts etc for stainless
The actual dipping price isn't that bad £850 for everything, they dip in acid then rinse it, then hand it back to me for the metalwork repairs,So how does it work?
then comes the pricey bit, after the metalwork been done I hand it back, then they dip it a 2nd time £450, then dip it in the e-coat £1700
I could just go for a normal spray primer, but I think i'll get better coverage of the parts by getting them dipped in e-coat!
Re: 76 Colt Galant GTO GSR 2000
Yes. 100%partyboyjay wrote:Hope I'm making everyone proud!
I love the commitment you're putting into this and you're doing everything the right way
This is how it's done kids.partyboyjay wrote:Every time I came to disconnecting a wire I took a photo of where it was, then I've bought these cable ties with flat label areas where I can write on, I labelled up 2 cable ties, attached one on each end of the connection, then after my bases were covered I disconnected the plugs
probably not taking as many photos as I could, (missing things like where the handbrake goes), but all screws, nuts and bolts are getting bagged up in separate bags, with labels inside saying where they came from, what they're attached to, if theres any missing!
This is done regardless of placing, for instance, when I come to put the handbrake back on I know how many screws go in, I know what length they are supposed to be etc.
The length and size of the bolts etc is mainly for me as I plan on replacing all the nuts, bolts etc for stainless then I can simply switch them out as and when I put things back on
Least amount of hassles possible on re-assembly
Dave...
If you want any sigma-galant.com stickers, then look here for how to get them sigma-galant.com stickers
Re: 76 Colt Galant GTO GSR 2000
There's a mob here in Adealide that tanks whole car shells and seals them - "Minus Paint". It's an expensive process but gets rid of all nasties and protects the body channels and hidden sills. At some point when I have funds to work with (  ) I'll be sending my wifes Karmann Ghia off to get the full treatment. Yeah, it's another one of those 'one day' projects...
Re: 76 Colt Galant GTO GSR 2000
You're doing a great job. Enjoying watching the out come of this.
1976 Galant Hardtop
Re: 76 Colt Galant GTO GSR 2000
Great work Jay, admirable commitment!
-
partyboyjay
- Posts: 102
- Joined: Fri Nov 09, 2012 12:16 am
- Location: Yorkshire
Re: 76 Colt Galant GTO GSR 2000
anyone know if these were just stock on the gto's? or were compatable ones also on other models???Here is the factory battery tray/ heat shield
I am looking for one thats all, and have just missed out on one in NZ!
so if they are compatable between models, anyone have a spare??? also need the clamp on top aswell
Re: 76 Colt Galant GTO GSR 2000
The clamp shown above is not original, but just a generic clamp. The originals only suited smaller batteries.
-
mrelshauno
- Posts: 156
- Joined: Tue Sep 04, 2012 6:00 am
Re: 76 Colt Galant GTO GSR 2000
I know it's all personal preference, but I wouldn't worry too much about an original battery clamp.
In my build I am keen to try and keep the battery under the bonnet as thats where they belong. Even if it means using a small sealed unit similar to what helicopters use.
In my build I am keen to try and keep the battery under the bonnet as thats where they belong. Even if it means using a small sealed unit similar to what helicopters use.
-
partyboyjay
- Posts: 102
- Joined: Fri Nov 09, 2012 12:16 am
- Location: Yorkshire
Re: 76 Colt Galant GTO GSR 2000
the clamp i aren't that bothered about, but would be nice to get a heat shield for it, does anyone know if they were just for the gto? or did other galant models have the same? if they did would they fit the gto? and does anybody have one or can get one?I wouldn't worry too much about an original battery clamp.
-
partyboyjay
- Posts: 102
- Joined: Fri Nov 09, 2012 12:16 am
- Location: Yorkshire
Re: 76 Colt Galant GTO GSR 2000

First lot of parts organised and sent off to shotblasters, then repair time, then powdercoaters