Our 1975 GC Hardtop (pic heavy and epic read!)

Members Rides can be viewed here, remember when posting here to keep mechanical discussions for its appropriate forum.
User avatar
Tj.
Posts: 668
Joined: Wed Apr 15, 2009 8:46 pm
Location: Western Sydney

Re: Our 1975 GC Hardtop (pic heavy and epic read!)

Post by Tj. »

No, the TB is closed in this photo.
At WOT the hook for the cable is at about 10 o'clock.

I'm trying to measure up the requirements for the new cable at the moment.... bit of a head scratcher :hit:


In the mean time, I've made up the vacuum line for the brake booster that I mentioned earlier.
My old man was able to score an offcut length of 3/8th's annealed steel tubing from a truck body builder, free :thumpsup: They use it for running airlines for brakes, suspension etc.
It's the perfect size for the vac hose and is nice and tight, although I think I might still run clamps.

It's not the easiest stuff to bend. It's plenty malleable but it tends to kink. Thankfully i didn't need any tight bends and was able to make some smoother, long bends.

Here it is after bending:

Image

The bends are a little rough and lumpy looking, however, where it's going, you can hardly see it.

Mocking up:

Image
Image

See, nice and tucked away.

The finished product after a coat of black paint:

Image

The manifold end of the hose curls around the charcoal canister, passing under the bracket to meet the connection on the manifold straight on. Plus the charcoal canister hides it almost completely.
It's held in place with some cable ties at the moment which I don't like too much but I could think of another way to do it. There's not enough room for P-clamps.

Looking at it after it was done I think i could have just run tucked the hose under the same area, but I think this is a little neater plus I don't have to worry about it heat affected. Plus this just feels more permanent.
1975 GC Galant Hardtop - 4G63 DOHC - Version 3.0 coming soon.
http://www.sigma-galant.com/viewtopic.php?f=46&t=485
User avatar
77galantv6
Posts: 845
Joined: Mon Mar 23, 2009 8:10 pm
Location: Newcastle, NSW

Re: Our 1975 GC Hardtop (pic heavy and epic read!)

Post by 77galantv6 »

i am so in love with this thing all it needs are the enkei's that were advertised on here earlier this year
and this would be the best coupe getting around

wheels here ---> http://sigma-galant.com/viewtopic.php?f ... 92d#p53658
'77 Galant V6....

1977 Galant with Commodore V6 conversion.

Image
User avatar
Tj.
Posts: 668
Joined: Wed Apr 15, 2009 8:46 pm
Location: Western Sydney

Re: Our 1975 GC Hardtop (pic heavy and epic read!)

Post by Tj. »

Would I be hated if I said I didn't really like those rims?

Don't get me wrong, I love Classic JDM rims (wantanabe's on a Z are horn!) and i think they're the only rims that look right on our cars.

I'm actually interested in a set of XXR 513's in gunmetal grey.

Eg:
Image
Image

Not true classic jap wheels but in they fit right in.
1975 GC Galant Hardtop - 4G63 DOHC - Version 3.0 coming soon.
http://www.sigma-galant.com/viewtopic.php?f=46&t=485
User avatar
75wagon
Admin
Posts: 5886
Joined: Sun Apr 12, 2009 5:16 pm
Location: Newcastle/Lake Macquarie

Re: Our 1975 GC Hardtop (pic heavy and epic read!)

Post by 75wagon »

Tj. wrote:Would I be hated if I said I didn't really like those rims?
No.
I do like them, but I'm happy with the Hustlers on my wagon.
Tj. wrote: I'm actually interested in a set of XXR 513's in gunmetal grey.
You do know that they are the rims 77galantv6 has on his car?
If you want any sigma-galant.com stickers, then look here for how to get them sigma-galant.com stickers
driftforlife
Posts: 117
Joined: Wed Aug 19, 2009 4:12 pm
Location: Greater Western Sydney

Re: Our 1975 GC Hardtop (pic heavy and epic read!)

Post by driftforlife »

YYYYYYYEEEEEEEESSSSSSS!!!!!!

those rims for sure!

p.s I idol your car hahaha :D sooooo awesome
.
Current
Nissan S15 Silvia Autech - stanced and low daily/drifter

Past
95 Honda Civic EG VTI - blew up :D
75 Chrysler Galant Sedan GC - :/
98 Subaru Liberty 2.5L RX AWD - old daily cruiser
91 Nissan Silvia S13 SR20DE - filthy drift pig that was a mistake to try have as a daily
76 Chrysler Galant Sedan GC - sadly missed ;(
.
User avatar
77galantv6
Posts: 845
Joined: Mon Mar 23, 2009 8:10 pm
Location: Newcastle, NSW

Re: Our 1975 GC Hardtop (pic heavy and epic read!)

Post by 77galantv6 »

something like this?

Image

mine are in black rather than the grey though....
'77 Galant V6....

1977 Galant with Commodore V6 conversion.

Image
User avatar
Tj.
Posts: 668
Joined: Wed Apr 15, 2009 8:46 pm
Location: Western Sydney

Re: Our 1975 GC Hardtop (pic heavy and epic read!)

Post by Tj. »

:eek: wow. They are perfect.

Are they 14's or 15's?, The fize and offset on those is bang on (looks wise anyway) Do they give you any grief clearance wise?
1975 GC Galant Hardtop - 4G63 DOHC - Version 3.0 coming soon.
http://www.sigma-galant.com/viewtopic.php?f=46&t=485
User avatar
77galantv6
Posts: 845
Joined: Mon Mar 23, 2009 8:10 pm
Location: Newcastle, NSW

Re: Our 1975 GC Hardtop (pic heavy and epic read!)

Post by 77galantv6 »

they are 15 x 8 . 0 offset. (9 inch wide overall)
only clearance issue was the edge of the rear guards (rubbed slightly),
got the guards rolled by sydney guard rolling and no issues since.
from memory the rear guards on the coupes are larger than the sedans
so should be perfect for yours
'77 Galant V6....

1977 Galant with Commodore V6 conversion.

Image
User avatar
75wagon
Admin
Posts: 5886
Joined: Sun Apr 12, 2009 5:16 pm
Location: Newcastle/Lake Macquarie

Re: Our 1975 GC Hardtop (pic heavy and epic read!)

Post by 75wagon »

Just so you know Tj, 77galantv6 is running GK (2 bolt) style struts, that narrows his front track, and gives him more clearance to his front guards.

Dave...
If you want any sigma-galant.com stickers, then look here for how to get them sigma-galant.com stickers
A112H
Posts: 7681
Joined: Tue Mar 24, 2009 5:01 am

Re: Our 1975 GC Hardtop (pic heavy and epic read!)

Post by A112H »

77galantv6 wrote: from memory the rear guards on the coupes are larger than the sedans
so should be perfect for yours
Yes they do.
My rear wheels are also 15x8 +0 and as you can see there is no need to roll the rear gaurds, in fact I am thinking about 20mm spacers :P

Image
User avatar
Tj.
Posts: 668
Joined: Wed Apr 15, 2009 8:46 pm
Location: Western Sydney

Re: Our 1975 GC Hardtop (pic heavy and epic read!)

Post by Tj. »

Well that's good to know, I really don't want to roll the guards as i have a complete set of quite straight and clean chrome trims that i think set off the look of the car and I dont really want to run without them if i can avoid it.

How do they go one the front?
1975 GC Galant Hardtop - 4G63 DOHC - Version 3.0 coming soon.
http://www.sigma-galant.com/viewtopic.php?f=46&t=485
A112H
Posts: 7681
Joined: Tue Mar 24, 2009 5:01 am

Re: Our 1975 GC Hardtop (pic heavy and epic read!)

Post by A112H »

Image
Image

Sticking out slightly but this is without any running gear, once it has some weight in it they should tip in at the top just right
User avatar
kenvv
Posts: 521
Joined: Thu May 06, 2010 11:31 am
Location: adelaide

Re: Our 1975 GC Hardtop (pic heavy and epic read!)

Post by kenvv »

a guy on boostcruising can order the xxr513 wheels in the sizes you want. i got a quote from him for i think $780 posted to your door new in your choice of their colour range.
vrooooom vrooooom!!
User avatar
77galantv6
Posts: 845
Joined: Mon Mar 23, 2009 8:10 pm
Location: Newcastle, NSW

Re: Our 1975 GC Hardtop (pic heavy and epic read!)

Post by 77galantv6 »

my guards are rolled and still have the chrome trim, just had to trim the inner lip of the chrome trim
'77 Galant V6....

1977 Galant with Commodore V6 conversion.

Image
User avatar
Tj.
Posts: 668
Joined: Wed Apr 15, 2009 8:46 pm
Location: Western Sydney

Re: Our 1975 GC Hardtop (pic heavy and epic read!)

Post by Tj. »

So one of the many small issues that I've had with this build turned out to be my own fault.
I was having trouble getting my gearstick in...... Yeah, I giggled at that too.

I posted it up over in the Transmission thread and Dave (75wagon) asked if I'd remembered the stop plate.
Looking in my dog-eared Gregory's manual I was convinced I had all the plates on. I didn't remember taking any off, my two other shifters were the same and the illustration in the book looked the same. That was until I looked closer and noticed there was a dome shaped plate went on the end.
Image
this little arsehole.

I found it after rummaging through my parts boxes and recognised it straight away.
Put it all together and it bolted straight in, the new nylon bush makes it feel nice and taught too. (as taught as these gearboxes are gonna get anyway)

Image
a shot of it in place and the illustration in the book.

Anyway, the GF is happy now that I've finally fit my stick in her box...... uhh, wait... that came out wrong.


In more slightly uninteresting news I've got the radiator hoses sorted. After some advice that seemed almost too obvious I used a Starion bottom hose which was perfect except for the radiator end of the hose pointing straight down instead of turning 90deg to meet the radiator.
No matter, the left over piece of the mazda hose I'd chopped up for the top hose had a nice 90deg bend left in it. I joined it using the transfer pipe (for lack of a proper term) that went from the water pump to the bottom of the radiator in the sonata I took the engine from (lesson: never throw anything out :lol:)
I didn't need it anymore as it wasn't compatible with the Starion water pump and it was the perfect diameter for the hose, and there was a substantial straight piece too. Best part was, I didn't have to buy anything :thumpsup:

I also connected the heater up too. Sort of.
I've mentioned before, my heater hoses are coming through the firewall on the drivers side, just next to the top of the clutch pedal where some old A/C lines used to come through. Using some 5/8th soft drawn copper refrigeration pipe, some elbows and some heater hose, I've managed to plumb it around and under the fan box. It ain't pretty but it's connected and it's hidden anyway.
I haven't been able to find a heater tap to use so it's connected without one for now just to get though rego. It'll get bypassed as soon as it passes. I might fiddle around with an inline tap somewhere in the system later but I might just leave it bypassed in summer and just connect it in winter.
I used to do this way back in the day and it was fine.

Now I'm waiting for it to cool down outside so I can rummage through the garage to find my tailshaft bolts. They could be bloody anywhere :roll:
1975 GC Galant Hardtop - 4G63 DOHC - Version 3.0 coming soon.
http://www.sigma-galant.com/viewtopic.php?f=46&t=485
lb4g63
Posts: 17
Joined: Mon Nov 29, 2010 7:35 pm

Re: Our 1975 GC Hardtop (pic heavy and epic read!)

Post by lb4g63 »

Just been reading your build up, looks very impressive, many hours go into something like this, keep it up.

George
User avatar
Tj.
Posts: 668
Joined: Wed Apr 15, 2009 8:46 pm
Location: Western Sydney

Re: Our 1975 GC Hardtop (pic heavy and epic read!)

Post by Tj. »

Well, bad news kids.
The bloke that i had lined up to do the wiring for me has fallen through. He is an auto sparky but was gonna do it out of hours (presumably) which means that I'm now faced with two options:
  • Cold call a sparky and get a quote (and then presumably shit my pants after being told the cost)
or;
  • Do it myself.
I can use a soldering iron, but that's about as far as my electronics expertise goes :banh:

I've been scouring the web for 4G63 wiring diagrams with out much luck, but I've been finding some useful info over on projectzerog.com biggest problem there is that most of those guys run aftermarket ecu's.

Anyone have any suggestions for me?
1975 GC Galant Hardtop - 4G63 DOHC - Version 3.0 coming soon.
http://www.sigma-galant.com/viewtopic.php?f=46&t=485
User avatar
Nath76LA
Posts: 626
Joined: Sat Feb 27, 2010 6:51 pm
Location: Hawkesbury NSW

Re: Our 1975 GC Hardtop (pic heavy and epic read!)

Post by Nath76LA »

Sorry to hear mate. That's bit of a set back.
All I can really suggest is to ring around and get quotes. My dad uses a auto sparky in Victoria Rd Castle Hill that does a bit of work for him. I can get his details for you if you like.

Nath
1976 Galant Hardtop
A57C
Posts: 323
Joined: Wed Dec 23, 2009 12:23 pm
Location: here

Re: Our 1975 GC Hardtop (pic heavy and epic read!)

Post by A57C »

not sure if this helps, but before i put my twin cam swap on hold, i was planning on running an s13 harness and ecu
much more aftermarket support and didn't have to spend big on standalone
woops
Posts: 526
Joined: Wed Mar 25, 2009 1:09 pm
Location: Brisbane Northside QLD

Re: Our 1975 GC Hardtop (pic heavy and epic read!)

Post by woops »

I might be able to help you out a bit. I know where you can get hyundai twin cam wiring details but not the mitsubishi ones. I have also converted the Hyundai style one where they only show each individual component with the wires coming out of it into a full schematic showing the complete wiring diagram. It's a bit messy but it's better than nothing.

Also on a side note, is there any questions you would have about any other problems about putting the twin-cam in. It's just that i'm gonna see Jamie tomorrow with his twin-cam coupe and i know that many people had questions about how he managed to do it. I can take plenty of photo's of the smaller details for anyone who asks before 7:30 tomorrow morning.
'72 GB Galant Sedan nanna spec daily
'85 GN Sigma Wagon 4g63 SOHC Turbo almost ready for the road
'74 GC Galant Coupe long term project
User avatar
Tj.
Posts: 668
Joined: Wed Apr 15, 2009 8:46 pm
Location: Western Sydney

Re: Our 1975 GC Hardtop (pic heavy and epic read!)

Post by Tj. »

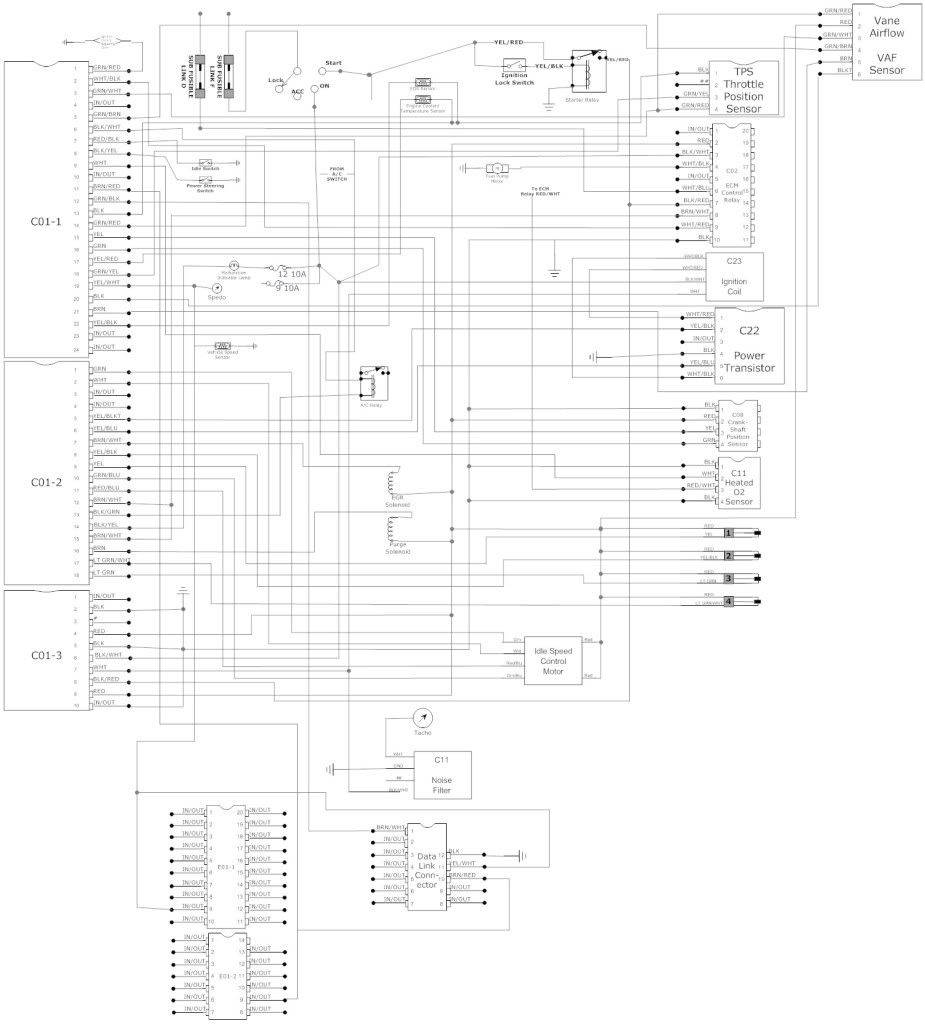
Woops, that diagram might be of use (i'm running a hyundai setup) but i did manage to get hold of an online manual that explains the circuit layout for each individual component but no whole layout in any useful sense.

In other news;

I've been relatively busy of late, there's never not anything to do with this car :mrgreen:

First off, while I was up in the loft in the garage (yeah, I have a mezzanine in the garage :P 
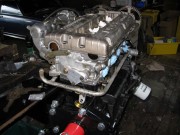
) rummaging around for something I realised that it's a good vantage point for a bird's eye shot of the engine bay. Here's a cruddy snap I shot with my phone.

Image

A bit blurry but it's a good shot. Missing from this pic is the radiator hoses and (not that you'd really see them) the heater connections in the firewall (more on that a tad later)
Ignore the ugly S-shaped air box hose sitting in there, I was using it to reference something. It's going in the bin. but from here you can see where I've mounted the airbox, where I've moved the battery too (there's a few good reasons it's not in the boot and less wiring is one of them) which might be going in an enclosed battery box yet, just to hide the ugly looking thing.
and you can (sorta) see my half finished throttle cable mount. I may have over engineered it a little :roll: whatever, I've got plenty of sheet left.

Now, one thing that's been keeping me up at night has been connecting the heater box. I've given up on a heater tap for now and I'm just going to bypass it when it's not needed.
I had several ideas about making a set of pipes using 5/8" refrigeration piping, which I picked up just over a metre of the soft drawn type (you can bend it with your hands) plus some elbows from reece plumbing (who'd have thought of going there for car parts :stupid: ) and bending and soldering a set to carry coolant from the firewall all the way over to the heater matrix inlet only using a short length of rubber hose.
Well, that sounds like a good idea, but as usual these things never work out in practice.
It would have been way too fiddly to measure, cut, bend, solder TWO of the damned things all whilst essentially standing on my head under the dash (i hate working under the dash in any car, let alone one this small) so I went the other direction.

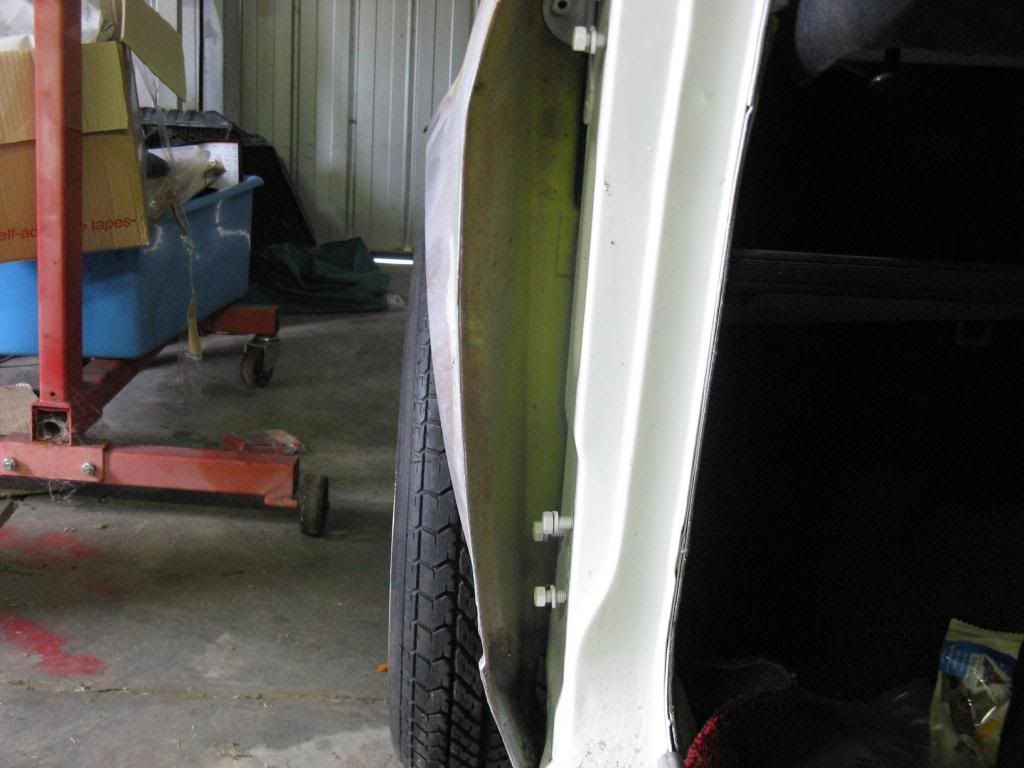
I forced two lengths of hose onto the in and out's of the matrix and fed them around the heater box like so;

Image

I did it this way because there's not enough room for both to go behind and there was no easy way to twist the hose facing into the cabin back around the heater box with out kinking it.
The hose sitting behind the box is connected to the pipe facing the firewall, and the one poking though underneath the heater tap cable clamp thingy (over the top of the box... sort of) is connected to the pipe facing the cabin of the car.
you can see what a mess the last bodgy patch up made under there. Luckily you can't really see it.... the heater box still bugs me though, you can't see it but I KNOW that it's filthy and that's enough to make me fret over it :lol:
something else you can just see in this photo is the round silver shape at the back of the ashtray in the top of the picture. I wonder how many of you don't know that it's actually a light that illuminates the ashtray? how awesome's that!
I got it working when I originally put the car back together, but I wonder if it still works?

Anyway, back on topic...

This car originally had aircon back in the day. Dad and I tore it out many years ago, but now I'd wish we'd kept it (A/C is on the wish list considering how easy mounts and condensers etc are to get for this motor, plus the factory computer has all sorts of control over it too)
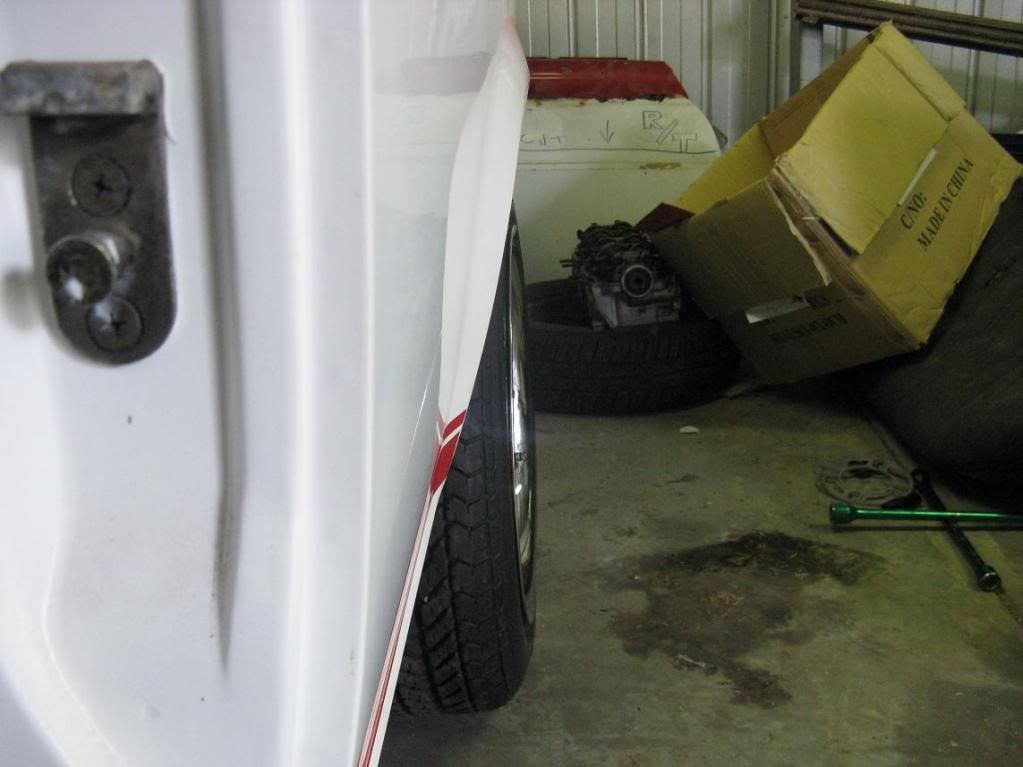
In any case, the A/C delete left two holes just above the clutch pedal on the firewall that I decided to put to use for the heater.

I made these up out of the aforementioned 5/8" fridge pipe (got the old bloke to silver solder them [pretty cool thing to watch I might add])

Image

The short one is for the hose around the back, the long one for the hose coming over the top.

I then picked up a pair of round grommets from my mates at spectrum rubber [/sarcasm] which only needed a little modification before the whole shooting match was shoved through the holes

Image


I (after installing them :| ) decided i should paint them black to make them much less noticeable. I used a good coat of black engine enamel (hi-temp, see?) but got impatient while waiting for it to dry, hence why the finish is a bit shabby. Whatever, you could only notice it because there was something shiny copper coloured sticking out under the dash. The carpet covers most of it anyway.

With the centre console back in :thumpsup:

Image

Anyway, I gotta bail, I have a whole post on the wiring (that I tackled myself) coming up soon!
1975 GC Galant Hardtop - 4G63 DOHC - Version 3.0 coming soon.
http://www.sigma-galant.com/viewtopic.php?f=46&t=485
woops
Posts: 526
Joined: Wed Mar 25, 2009 1:09 pm
Location: Brisbane Northside QLD

Re: Our 1975 GC Hardtop (pic heavy and epic read!)

Post by woops »

Here is the wiring diagram I have worked out as best as I was able to do at the time. It isn't complete as I wasn't able to work out all of the wiring connections. Unfortunately it also isn't nice and neat like most are used to and I should also have at the time of making the diagram but didn't think about actually putting in the harness connection plugs. Also it isn't complete for the entire vehicle as I pretty much focused on the wiring required for engine operation. I have the file in a SmartDraw format here as well if you wanted to add to the diagram. All the information I sourced and pieced together from the wiring manual on the website www.hmaservice.com which I think you may have already found. I might in the next few weeks try to complete it but I'm a bit swamped at the moment with starting a new job and having to learn the new design software they use. I hope it's of some help to you though.

Image
'72 GB Galant Sedan nanna spec daily
'85 GN Sigma Wagon 4g63 SOHC Turbo almost ready for the road
'74 GC Galant Coupe long term project
User avatar
Tj.
Posts: 668
Joined: Wed Apr 15, 2009 8:46 pm
Location: Western Sydney

Re: Our 1975 GC Hardtop (pic heavy and epic read!)

Post by Tj. »

Thanks woops. The colours don't quite look all the same as what I have but if I reference it with all the other diagrams and bits & pieces I have it'll still be a big help.

Anyway, More progress:

I found a place to mount the computer where it's nice and hidden.
I started to look at the bottom of the plenum chamber as an ideal spot. It has a relatively flat area of the body right behind/under the glovebox.

It presented a small dilemma though, if I bolt it directly onto that spot, the bolt holes will be exposed to what is effectively a big gutter. There was no way to waterproof it properly. But then I had an idea, I made some brackets that mount elsewhere but hold it in that spot.

Image
Image
Image

The bolt in the bottom of the bracket bolts into the bottom mount for the parcel shelf. Simple but it works a treat. It was a little wobbly though so i made up a little stay that goes from the top of the bracket and shares the mount that the tube for the passenger side vent bolts onto. It's far from the prettiest set up but it's steady and well hidden.

I then made a channel in that underlay stuff for the loom to run through so it wouldn't bulge through the carpet and then started to make a hole for the loom to pass though the firewall.
I tried using a holesaw but all that it cut was all of its teeth off :facepalm:
So I begrudgingly pulled out the drill and started making a ring of holes. It took a while but (thanks to the wear mark from the gummy holesaw) it ended up pretty round:

Image

once i'd done that, I used what I can only describe as a small pointed cold chisel that I found in the tool box to knock through the small spots of steel joining the holes. A bit of a run around with a round file and it was nearly perfect. Nearly.
I discovered later while feeding the loom through that what I had created was a hole that sustains it's existence solely on my blood and girlish screams

Image

Whatever. It works.

Oh and here's a few little tips for this job:
  • head to the wreckers to find a firewall grommet. They're not all suitable but you'll find a nice simple one eventually (I got mine from a holden rodeo i think) plus, the dude at the counter will more than likely not bother charging you for it :thumpsup:
  • thats a pretty cramped space to work in so remove the passenger seat, parcel tray, glovebox and centre console. They're all piece of piss to remove and put back in and they really open up a lot of room
The hole passes through into the engine bay nice and low hidden below the manifold so it's relatively hidden.

Now, let me share with you my experience attempting to wire up this engine.

AAAAAAAH!!! AAAAH! AHHH! AAAAAAAAHH!!!!!
Image

OH DEAR GOD, GAAAAAAAHHHH!!
Image

AHHHHH! (I managed to remove this much, took me two whole days though) BAAAHHHHHH!
Image

PLEASE!, PLEASE MAKE IT STOP! JUST MAKE IT STOP!!
Image

So, yeah. That pretty much sums it up.
It is, however, far from finished :banh:
1975 GC Galant Hardtop - 4G63 DOHC - Version 3.0 coming soon.
http://www.sigma-galant.com/viewtopic.php?f=46&t=485
User avatar
77galantv6
Posts: 845
Joined: Mon Mar 23, 2009 8:10 pm
Location: Newcastle, NSW

Re: Our 1975 GC Hardtop (pic heavy and epic read!)

Post by 77galantv6 »

keep at it mate, how good will it be when you've done it yourself and you can proudly say so!
am loving the progress of this coupe,
definitely one of my top 5
:thumpsup:
'77 Galant V6....

1977 Galant with Commodore V6 conversion.

Image
Smithy
Posts: 320
Joined: Fri Mar 12, 2010 11:15 am

Re: Our 1975 GC Hardtop (pic heavy and epic read!)

Post by Smithy »

Yeah congrats on doing a good job.May seem tedious now but it will be well worth it when its done.
User avatar
GC75
Admin
Posts: 2206
Joined: Tue Mar 10, 2009 8:30 pm
Location: Gold Coast, QLD

Re: Our 1975 GC Hardtop (pic heavy and epic read!)

Post by GC75 »

very good work man, love this car!
Previous owner of a GC Coupe, a few GSRS and random Sigmas.
Converted to the Ultimate Driving Machines
User avatar
Tj.
Posts: 668
Joined: Wed Apr 15, 2009 8:46 pm
Location: Western Sydney

Re: Our 1975 GC Hardtop (pic heavy and epic read!)

Post by Tj. »

Not too much news to report at the moment.

I have a water pump pulley being re-drilled so it fits my water pump and spins true (and doesn't wobble about like the one I tried to modify :$ ) and I have a new longer throttle cable being made. For the third fkn time! :@ the dirty turd burglars keep doing it wrong.

I've also pinned down a sparky in my local area that specialises in this type of work. http://www.sideshowsperformancewiring.com.au He seems familiar with the mitsubishi system too which is a bonus. But he's not really available for another 2-3 weeks so I'm just sitting on my hands at the moment.

Still, the list of fiddly shit is never ending and so theres a little bit of work so show off..... well, that is if I was actually proud of it :\

Image

I've plumbed the airbox at long last. But not how I wanted to.
Due to the position of the TB and the airbox the angle is too sharp and it's all too close together to use some nice polished aluminium tube. Unfortunately I found this out after buying two bends at nearly $30 a pop :banh:
Anyway.
I used some flexible tubing that I had bought when I first started fiddling around with the airbox. It ain't pretty but it'll work. It's the first real compromise that I've had to make with this build so far, more so out of lack of enthusiasm to spend weeks thinking up ideas and stuffing about making them. I'll save that for another time.
The second piece snaking around underneath is to channel in cold air. I'm going to mount it somewhere that's not too low but picks up a decent flow of cool air. It's either that or have it sucking hot air from virtually the middle of the engine bay plus its the left over from the air box to TB tubing so it can't hurt

I've also started shortening some of the wiring. The loom from the sonata is a mile too long so I'm cutting and shutting all the plug looms. One wire at a time :hit:
Better I do it in my spare time during the 2-3 week wait to get into the sparky rather than pay him to do it.

I guess I'll just keep plugging on (H)


*edit* I just realised that's a really bad pun :stupid:
1975 GC Galant Hardtop - 4G63 DOHC - Version 3.0 coming soon.
http://www.sigma-galant.com/viewtopic.php?f=46&t=485
User avatar
Tj.
Posts: 668
Joined: Wed Apr 15, 2009 8:46 pm
Location: Western Sydney

Re: Our 1975 GC Hardtop (pic heavy and epic read!)

Post by Tj. »

So.. not a great amount to report at the moment... still, not in pictures anyway.

I've finished of as much of the wiring as I can on my own. The loom is dramatically shorter, I've managed also to hide the injector wiring by turning the injectors themselves around 180deg so that the plug faces down to the manifold and tucked the injector wires under the coil pack and heat shrunk them into a tidy little bundle that hides away under the plenum out of sight!
I'll get photo's up soon.

I'm still having issues getting a throttle cable made. The last bunch of butt-pirates that tried to make my cable have flat out refused to try for a 4th time to do their bloody job and produce a cable within the criteria stipulated to them! :@ They got it wrong several times, and then refused to fix it.
In the end, I got my money back and then stumbled across a company here in Sydney (rather than melbourne) who will make it for $40 (as opposed to $215 :|) and turn it around in a day (rather than two weeks!!) I should be getting it within the next day or two :thumpsup:

Another job that I thought was little but looks like it's turning out to be an enormous headache is the pipe running from the water pump to the heater. Because of the extractors being a little on the large side and the heater lines being quite close to them it's going to be a little tight, hopefully I'll have a solution nutted out in a few days. Alternatively I can blank it off for now and worry about it later.

I thought it'd be a good idea, seeing as how the car has been sitting dormant for a bit over 12months, to drain the fuel out of the tank. It'd more than definitely gone stale by now and i figure if I take bad fuel our of the picture now, it'll be one thing to cross off the list if there's any issues starting the motor up first time.
While I did this I noticed that there was a leak coming from the drivers side rear drum brake :facepalm: and having just bled the rear brakes I discovered that the same brake had more or less seized on :facepalm: :facepalm:
So I thought it best to pull the whole thing apart to see just how bad it is.
The rear master cylinder is leaking pretty bad (and judging by the gunk inside the wheel itself I'd say it's been leaking for sometime, while the car was running last too by the look of it) the rear shoes could use replacing and the drums could use a machining :facepalm: :facepalm: :facepalm:

Oh and on top of this the diff seems to be leaking as well. I have another diff centre somewhere in the garage so somewhere in the not to distant future I might get it reco'ed, pull the diff out and overhaul the whole damn thing brakes and all. It is pretty much the only thing in the car that hasn't been replaced or refreshed yet. But I'll worry about that later.

On the plus side, it's booked in to go to the auto electrician this Wednesday to get the wiring finished off! (H) So I thought I'd show it some love and give it a tub before it goes for a little holiday.... and then it started bucketing down with rain :wut:

Just couldn't win this weekend.

Anyway, whilst it had the bonnet back on (if only just sitting on, not bolted on) and had all the covers off I thought I'd snap a pic of it peering ever expectantly out of the garage door

Image

It's the first time in quite a few months that I've seen it without covers, I'd sort of forgotten what an attractive shap this car has :grin:

The reson behind this sudden big push to get the car complete is that I'm determined to have it running and enter it into next months All Japan Day!
http://www.sigma-galant.com/viewtopic.php?f=45&t=6763
and;
http://www.alljapanday.com.au
It'll be tight, but I'm gonna try! With a bit of luck, I'll be able to line it up alongside Nath's hardtop.
1975 GC Galant Hardtop - 4G63 DOHC - Version 3.0 coming soon.
http://www.sigma-galant.com/viewtopic.php?f=46&t=485
dwlee
Posts: 86
Joined: Mon Sep 07, 2009 5:38 pm

Re: Our 1975 GC Hardtop (pic heavy and epic read!)

Post by dwlee »

If you are running a rwd water pump you shouldn't be having any issues unless your extractors are really huge. See the photo below on how it looks using the factory rwd water pump/metal return pipe and oil filter housing. For those wondering this is a RVR head with the cam angle sensor on the front with the water flow redirected to exit via the front of the head and using an evo4 inlet manifold.

Image
User avatar
Nath76LA
Posts: 626
Joined: Sat Feb 27, 2010 6:51 pm
Location: Hawkesbury NSW

Re: Our 1975 GC Hardtop (pic heavy and epic read!)

Post by Nath76LA »

It'll be tight, but I'm gonna try! With a bit of luck, I'll be able to line it up alongside Nath's hardtop.
That's as long as I can go with the Galant. I've just realised I'm on call that weekend. Will see if I can get someone to cover for me on that day.

Nath
1976 Galant Hardtop
Post Reply