This thread will be made and the best possible pics taken to help out members with this conversion. For some pics and info that may be beyond my reach Im hoping that other members can help out by posting up the required pics and if i have missed anything. Then after all the correct info has been edited to the original post ill get Dave to lock the thread and clean it up.
Installing a 5sp gearbox to your Galant or Lancer
Firstly you need to find yourself a Sigma 5sp gearbox. The most suitable gearbox is from any Sigma other than a GN model. The Sigma must be a 2.0 as 2.6 manuals are wideblock and will not fit. However, 2.6's come in wide (manual) and narrow (auto or front drive) so to check the gearbox just to make sure. Measure.
narrow- 310mm
wide-330mm
use this link to find the differences between wide and narrow Mitsubishi Astron engines -insert link here-
Also to identify if the engine is a Astron or Saturn (Saturn engines were available in some early model GE sigmas) please look for stickers on the aircleaner assembly, and for either 4G32,4G52, or 4G54 cast below or around the starter motor area.
please note that all Astron engines are chain driven and early sigma 1600 engines were belt driven.
Saturn engine- 1300-4g30, 1400-4G33, 1500-4G31, 1600cc-4G32, 1750-4G35
Astron engine- 1850cc-4G50, 2000cc-4G52, 2600cc-4G54
There are two differences between sigma gearboxes,
Japanese 5sp- more commonly referred to as the Jap 5sp
Borg warner 5sp.
The Borg Warner gearbox is very well known for its unreliability, lack of strength, hard shifting and wont fit into a early model galant or lancer because of its size and fouls the transmission tunnel.
The Jap 5sp gearbox is a far more superior box than the Borg Warner, it is more commonly used for Galants and Lancers as it is physically smaller and has better strength, reliability, and shift feel. it is also a slightly different version of the Galant 4sp manual gearbox.
Here are the two gearboxes, note the obvious differences
-Jap 5sp narrow block
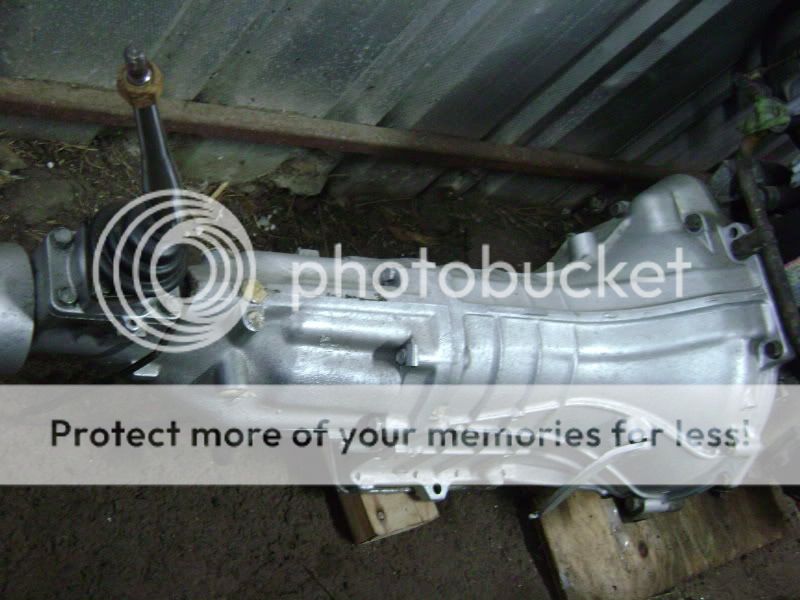
-Borg Warner
more info at:
http://www.sigma-galant.com/viewtopic.php?f=42&t=3569
Okay so once you have a suitable gearbox you can start fitting it to the car. Below is a list of the parts you will need to complete the conversion.
parts
-Rear gearbox mount- mackay part number-A2612 (also found listed as 5 speed mount for LB/LC Lancer Hatch)
-manual gearbox crossmember (if converting from auto to manual)
-clutch and pressure plate if converting from auto
-clutch cable
-weld in clutch cable hole in firewall
-spigoit bearing
Gearbox Removal/ Installation
-disconnect battery
-remove the center console from inside the vehicle
-remove the three 10mm head bolts that hold the gear shift onto the extension housing
-make sure car is SAFELY jacked up and on APPROVED JACK STANDS
-drain the gearbox oil before removing tailshaft.
-disconnect reverse light wires
-disconnect speedo drive by undoing threaded collar
-undo all bellhousing bolts except leave one finger tight.
-remove starter motor
-remove flywheel stone guard
-remove clutch cable from bracket on gearbox
-support the weight of the engine when undoing the rear gearbox crossmember by either a jack under the gearbox itself of a small piece of wood under the engine sump and crossmember.
-remove rear gearbox mount bolts
-make sure there is AT LEAST 1 bellhousing bolt left in, otherwise gearbox may fall causing injury.
-(if car is automatic, remove flex plate bolts through starter motor hole or flywheel cover hole)
-support box with a trolley jack and wiggle free from engine, you may need to use a screw driver between the engine and box to encourage it to move.
-once the old box is out, visually check the clutch for condition and replace if neccesary.
-if your vehicle is auto, remove the flex plate ant install new flywheel and clutch assembly
-okay so now the old 4sp or 3sp auto is out you will now need to slightly trim the trans tunnel hole back approx 15-20mm as the 5sp gearbox shifter is set toward the back of the car further.
-see photos-
-install the gearbox in the reverse order to how it was removed.
-please note that rear main oil seal should be checked for leaks at this time.
clutch throw out bearing should be checked for smooth operation and also clutch fork etc
when installing the 5sp the new gearbox mount should be installed into the crossmember.
note: 4sp/ 5sp rear mounts are essentially the same except for the bolt spacing.
-see photos-
-when installing the gearbox crossmember, you will notice the xmember sits further back and wont line up with the original threaded holes in the outer chassis rails.
-there are three tapped holes on each chassis rail, the forward two are used for the 4sp gearbox, and simply move the crossmember back one hole for the 5sp and it will bolt up.
see photos-insert here-
-only other modification required is to the gearstick hole in the transmission tunnel. It is located further rearward in the car. This can be fixed by cutting the same size hole in a new piece of steel, lengthening the original hole in the transmission tunnel and then use silicone and rivets to fix the new piece of steel in the required place. That way you can use you original rubber gearstick boot.
-please note removal and installation procedures are only a rough guide, if in any doubt consult a work shop manual, or a mechanic.
so can member please tell me if i have missed anything and im happy to add it or re phrase it. Also need photos for parts.