Restoring/Detailing Wagon Taillights

This section is for 1969 to 1976 Chrysler/Mitsubishi/Plymouth/Dodge/Colt Valiant/Galant/FTO/GTO/Colt/Cricket.
Post Reply
C_Fernance
Posts: 728
Joined: Tue Mar 17, 2009 1:19 am
Location: Central Coast

Restoring/Detailing Wagon Taillights

Post by C_Fernance »

Got up this morning and felt like doing some more work on the wagon. Only to find out it is raining again. :@

Decided to do one of the many fiddly jobs that will still need to be done so I can put it back together, cleaning up a set of taillights.

Thankfully i have around 3 sets of taillights for each side so I can pick and choose to make a really good pair. This however involves lots of cleaning as many of them were covered on overspray from previous repairs, etc. If you only have 1 set then you just need to be really careful - especially with the rubber seal - and do the best with what you have.

1st up select a light to dismantle and clean.
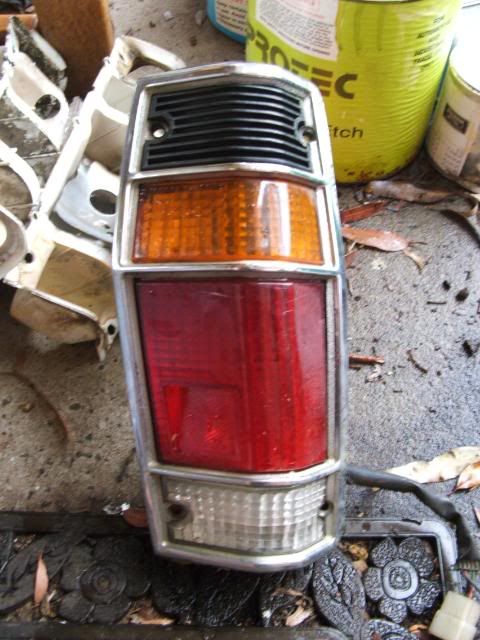
Image

Image

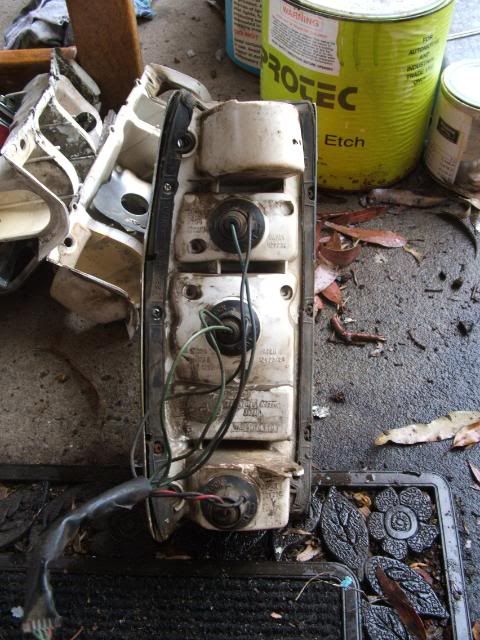
To begin with remove the wiring harness by twisting the globe holders anti-clockwise then pulling them out of the light.
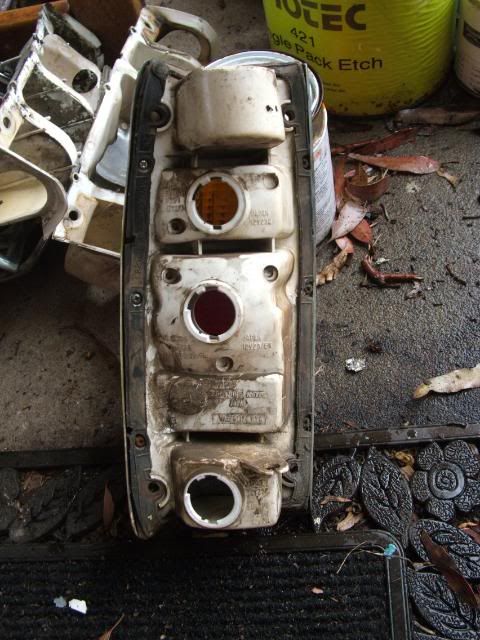
Image

Once this is done remove the 6 screws holding the chrome bezel in place. Use a #2 Phillips screwdriver and be very careful as the heads can strip easily if they are rusty. The chrome bezel should come off easily once they are all removed. Take note of which hole they come from as there are 2 different lengths depending on what size of the bezel they come from.

Image

Next up is to remove the lenses. If you are lucky they will come off easily. If they are stuck to the rubber seal be very careful about getting them off. Out of all the taillights i pulled apart I only got 2 good seals, 2 poor seals that could be fixed if needed, and the rest crumbled into dust. The taillight will not go back together properly without this seal.
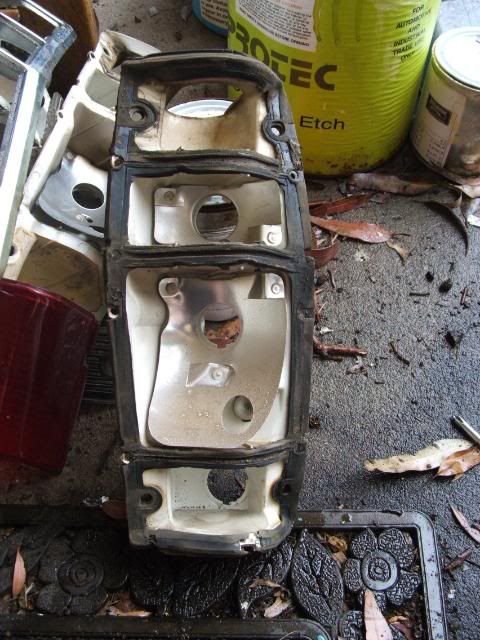
Image

You then need to remove the seal from the light housing. This wasn't as hard as removing the lenses but care still needs to be taken to avoid damaging the rubber seal. At this stage your taillight is now just a collection of parts.
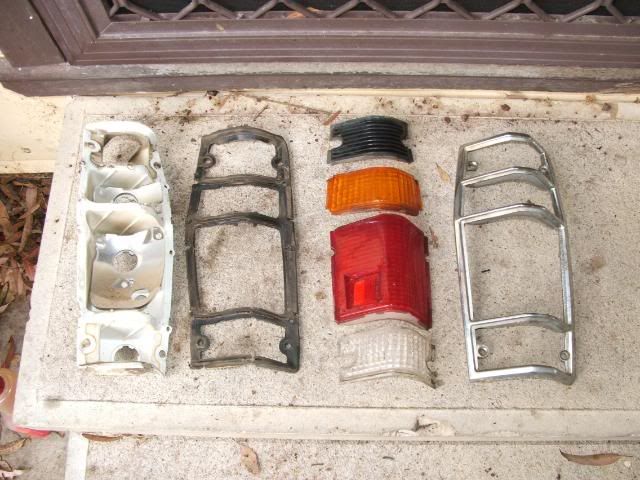
Image

Next up is to clean off all the dirt. I used 2 buckets - 1 with soapy water to clean the parts in, the other with clean water to rinse them in. I found using a toothbrush and a pipe cleaner was helpful in getting into all the tight spots. After doing the above steps for all my taillights i was left with a tub of parts to try and organise and put back together.
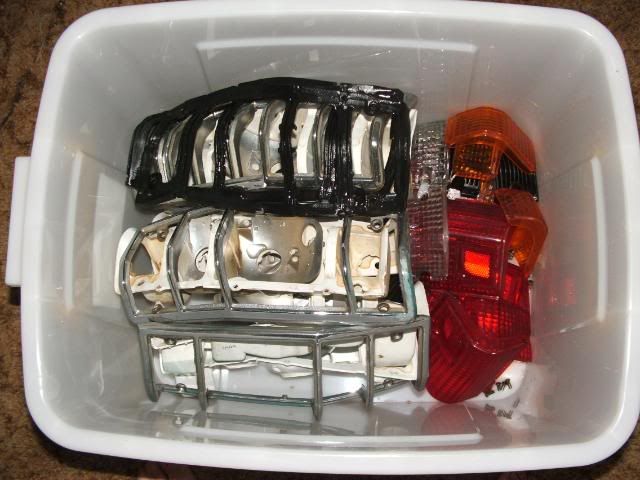
Image

Next up is to go through the parts and pick the best of the bunch to make your good taillight. Check for things such as cracks, chips, pitting and other damage. Once you have done this the polishing begins. For the lenses I used Mequiars Motorcycle Plastic Cleaner/Polish. For the chrome bezel I used Mothers Chrome Polish. For the lenses you will need to use plenty of elbow grease to remove any fine scratches. Deeper scratches or pitting may need a light sand with some really fine (ie. around 2000grit) sandpaper to remove the imperfections before polishing. The chrome bezel is a similar story however any sanding will damage the chrome. You will have to be content with just polishing them. Once all the polishing is done you should have a bunch of shiny parts ready to go back together. I got carried away and already put the rubber seal back on before taking the pic.
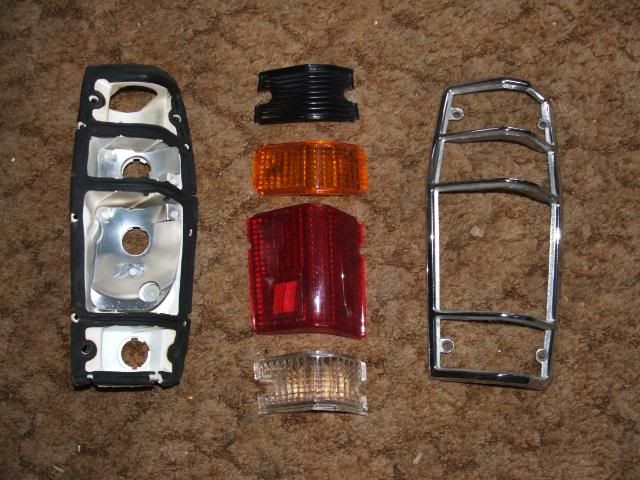
Image

Putting it back together I found it easiest to start with the chrome bezel. Sitting it face down on something soft i then placed the lenses into it. I then put the housing complete with rubber seal on top before screwing it back together with the 6 phillips head screws, taking care to put the correct length screws in each side. Give the wiring harness a quick wipe down before re-installing. A simple mater of pushing the globe holders in and turning clockwise to lock them into place. The taillight should then be ready to be put back in, while you will probably be ready for a cold drink while you sit back and wonder what mischief you can get up to now your fingerprints have been rubbed off with all the polishing.
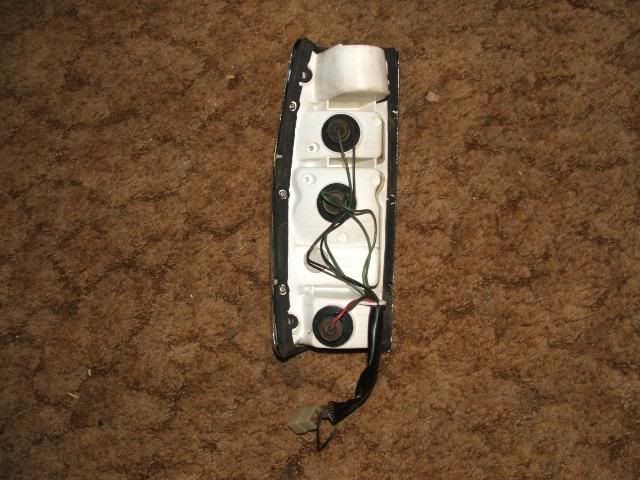
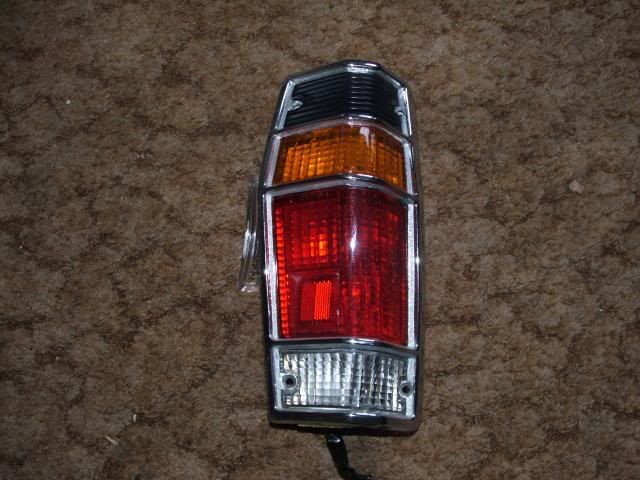
Image

Image
tandanus
Posts: 606
Joined: Sun Mar 22, 2009 7:36 am
Location: NSW Central Coast

Re: Restoring/Detailing Wagon Taillights

Post by tandanus »

Very nice!
Does the white plastic of the wagon light holder turn to dust as easilly as the sedan ones do?
T.
The highest reward for a man's toil is not what he gets for it but who he becomes by it.
John Ruskin
User avatar
75wagon
Admin
Posts: 5886
Joined: Sun Apr 12, 2009 5:16 pm
Location: Newcastle/Lake Macquarie

Re: Restoring/Detailing Wagon Taillights

Post by 75wagon »

They seen to survive a bit better, because the back of them aren't open to the boot maybe?
But I know what you mean. My GB sedan lights are crumbling too and they haven't been on a car in 13 years.
If you want any sigma-galant.com stickers, then look here for how to get them sigma-galant.com stickers
C_Fernance
Posts: 728
Joined: Tue Mar 17, 2009 1:19 am
Location: Central Coast

Re: Restoring/Detailing Wagon Taillights

Post by C_Fernance »

tandanus wrote:Very nice!
Does the white plastic of the wagon light holder turn to dust as easilly as the sedan ones do?
T.
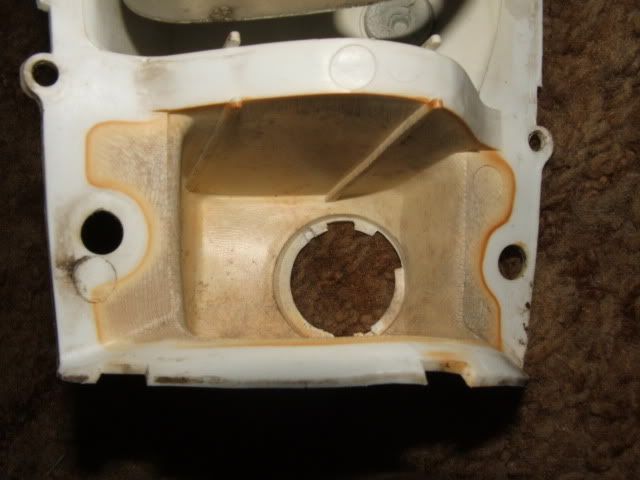
Possibly. The one i pictured was pretty good. A couple of the others were kind of stained inside the vent and reversing light section where UV light could reach them. The worst of them had started to craze on the surface but hasn't gone powdery yet. It would only be a matter of time though.

Image
User avatar
75wagon
Admin
Posts: 5886
Joined: Sun Apr 12, 2009 5:16 pm
Location: Newcastle/Lake Macquarie

Re: Restoring/Detailing Wagon Taillights

Post by 75wagon »

You've got me inspired Chris..
I might get my spare sets out and do the same. The only difference would be, I want to paint the black vent parts, in the dark grey same as the stripe on the tailgate.

Damn, more work. :banh:
Dan was here the other day, and picked the amount of oil around my motor. Guess who was just out in the garage with a toothbrush and cleaner removing old oil scum from their motor?

Will it ever end?
If you want any sigma-galant.com stickers, then look here for how to get them sigma-galant.com stickers
A57C
Posts: 323
Joined: Wed Dec 23, 2009 12:23 pm
Location: here

Re: Restoring/Detailing Wagon Taillights

Post by A57C »

cool. just did a similar cleanup/resto on my tails. but had to make new rubber seals from scratch ...
ozgdgalants
Posts: 63
Joined: Tue Apr 07, 2009 10:32 am

Re: Restoring/Detailing Wagon Taillights

Post by ozgdgalants »

Hi ALL just a little note about galant wagon tail lights some of the stop light lens are different the reflectors on some are large while some are smaller in size?. just some to check out before restoring them i don't no if it's GB are different to GC-GD so if somebody got some of each maybe they can let us no?. What model has the big or small. thanks wayne.
User avatar
davetrees
Posts: 1044
Joined: Sun Mar 22, 2009 5:02 am
Location: Sth Gippsland, Victoria

Re: Restoring/Detailing Wagon Taillights

Post by davetrees »

75wagon wrote:My GB sedan lights are crumbling too and they haven't been on a car in 13 years.
Similar problem with my GB sedan ..... although it seems to be mostly around the reversing light that the plastic goes all powdery. I've got 3 sets & they are all gone in the same area. I suspect it's partly a heat issue due to rev light globes being higher wattage than the others ?
A112H
Posts: 7681
Joined: Tue Mar 24, 2009 5:01 am

Re: Restoring/Detailing Wagon Taillights

Post by A112H »

davetrees wrote:
75wagon wrote:My GB sedan lights are crumbling too and they haven't been on a car in 13 years.
Similar problem with my GB sedan ..... although it seems to be mostly around the reversing light that the plastic goes all powdery. I've got 3 sets & they are all gone in the same area. I suspect it's partly a heat issue due to rev light globes being higher wattage than the others ?
I would have thought it was UV damage from the sun. As the reverse lights are clear the would get a full dose where as the amber and red lenses would filter the UV somewhat.
User avatar
75wagon
Admin
Posts: 5886
Joined: Sun Apr 12, 2009 5:16 pm
Location: Newcastle/Lake Macquarie

Re: Restoring/Detailing Wagon Taillights

Post by 75wagon »

You might have something there....
If you want any sigma-galant.com stickers, then look here for how to get them sigma-galant.com stickers
User avatar
davetrees
Posts: 1044
Joined: Sun Mar 22, 2009 5:02 am
Location: Sth Gippsland, Victoria

Re: Restoring/Detailing Wagon Taillights

Post by davetrees »

Galant_GT0 wrote:I would have thought it was UV damage from the sun. As the reverse lights are clear the would get a full dose where as the amber and red lenses would filter the UV somewhat.
Good point - didn't think of that ! Makes sense ....
Post Reply